Mini Banana Pudding Cheesecakes are the ultimate fusion of nostalgic Southern comfort and sophisticated, creamy indulgence. If you have ever found yourself torn between a classic bowl of banana pudding and a rich slice of cheesecake, this recipe is your answer. These individual dessert cups feature a crushed Nilla wafer crust, a velvety banana cream cheese filling, and a cloud of whipped cream that will have your guests reaching for seconds.
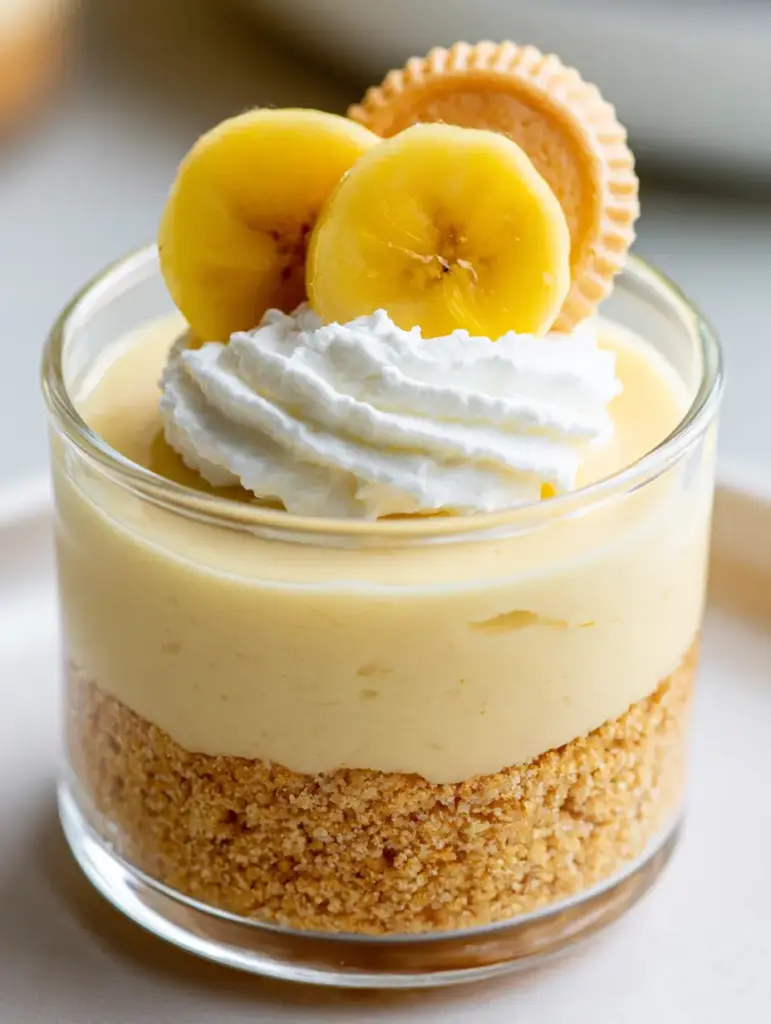
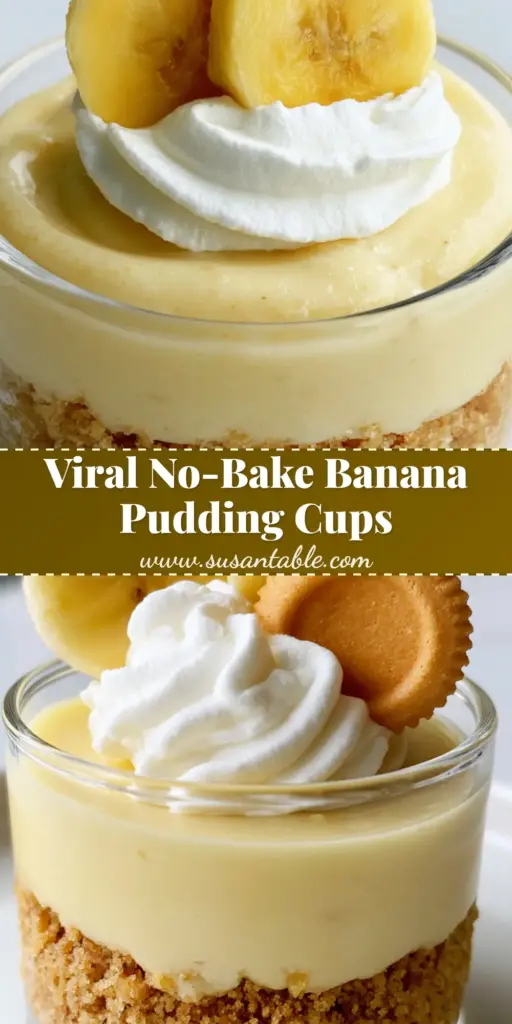
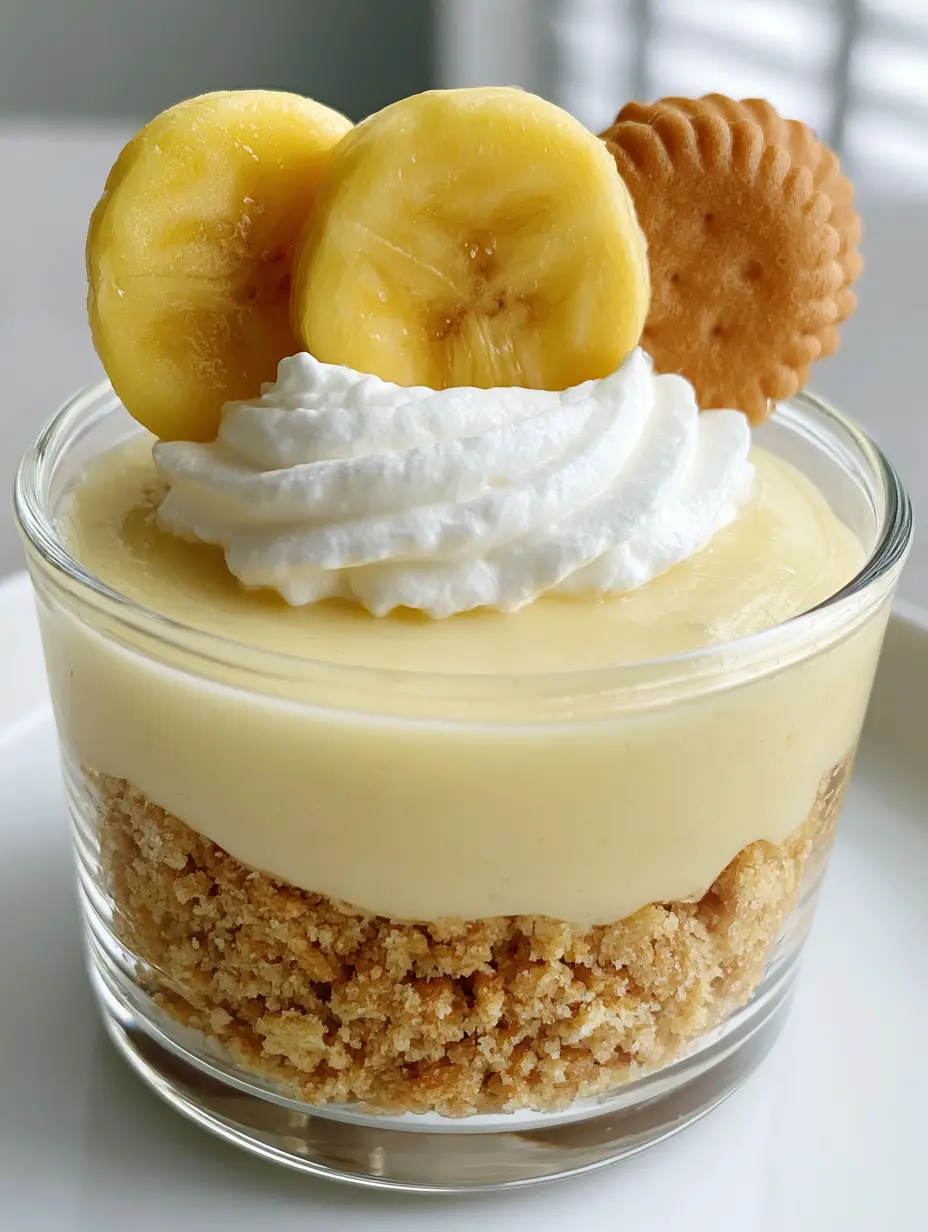
The beauty of these Mini Banana Pudding Cheesecakes lies in their presentation. Served in clear glass cups, every layer is visible—from the golden, buttery crumbs at the base to the perfectly pastel-yellow cheesecake center. Whether you are hosting a summer barbecue or looking for a viral-worthy treat to share on social media, these handheld delights are designed to impress both the eyes and the palate.
Why You Will Love These Individual Banana Cheesecakes
- Perfectly Portioned: No need to worry about messy slicing; these individual cups provide the perfect serving size every time.
- Visual Masterpiece: The contrast between the golden Nilla wafer crust and the pastel-yellow filling creates a stunning aesthetic that mimics high-end bakery displays.
- No-Bake Ease: While we capture the essence of a baked cheesecake, this version is chilled to perfection, keeping your kitchen cool.
- Texture Heaven: You get the crunch of the wafer, the silkiness of the cream cheese, and the airy lightness of fresh whipped cream in every bite.
If you love this flavor profile, you absolutely must try my Banana Pudding Cookies or these decadent Banana Pudding Brownies for your next baking session!
The Essential Ingredients for Banana Pudding Success
To achieve that Forensic Visual Accuracy we see in professional food photography, every ingredient serves a specific culinary purpose. Here is what you will need to gather for your Mini Banana Pudding Cheesecakes.
The Golden Crust Layer
- 2 cups (approx. 200g) Nilla Wafers: These provide the classic vanilla-malt flavor that defines authentic banana pudding. We will crush them into a thick layer of golden, buttery crumbs.
- 5 tbsp (70g) Unsalted Butter: Melted butter acts as the glue, ensuring your crust stays firm and rich.
- 1 tbsp (12g) Granulated Sugar: A touch of extra sweetness helps the crumbs caramelize slightly in flavor.
The Smooth Banana Cream Filling
- 16 oz (450g) Cream Cheese: Ensure this is full-fat and softened to room temperature for a rich, smooth filling without lumps.
- 1 package (3.4 oz / 96g) Instant Banana Cream Pudding Mix: This is the secret to achieving that specific pastel-yellow hue and concentrated banana flavor.
- 1 cup (240ml) Whole Milk: Cold milk activates the pudding mix to create a stable, mousse-like texture.
- 1 tsp (5ml) Pure Vanilla Extract: Enhances the aromatic profile of the bananas.
- 1 cup (approx. 240ml) Whipped Topping: Folded in gently to aerate the dense cream cheese.
The Iconic Toppings
- Fresh Whipped Cream: A neat dollop of fluffy white whipped cream provides the crowning glory.
- Fresh Sliced Bananas: You will need two fresh, perfectly sliced yellow banana wheels per cup.
- Mini Nilla Wafers: A whole mini Nilla wafer garnish adds the final professional touch.
Looking for more individual-sized treats? Check out my Cookie Butter Cheesecake Cups for a spicy, speculoos twist!
Step-by-Step Instructions for Perfect Layers
Creating these Mini Banana Pudding Cheesecakes requires a focus on layering. Follow these steps to ensure your clear glass cups look exactly like the professional Visual Recipe Blueprint.
Step 1: Construct the Buttery Wafer Base
Place your Nilla Wafers in a food processor and pulse until you have fine crumbs. In a medium bowl, combine the crumbs with the melted butter and sugar. Mix until the texture resembles wet sand.
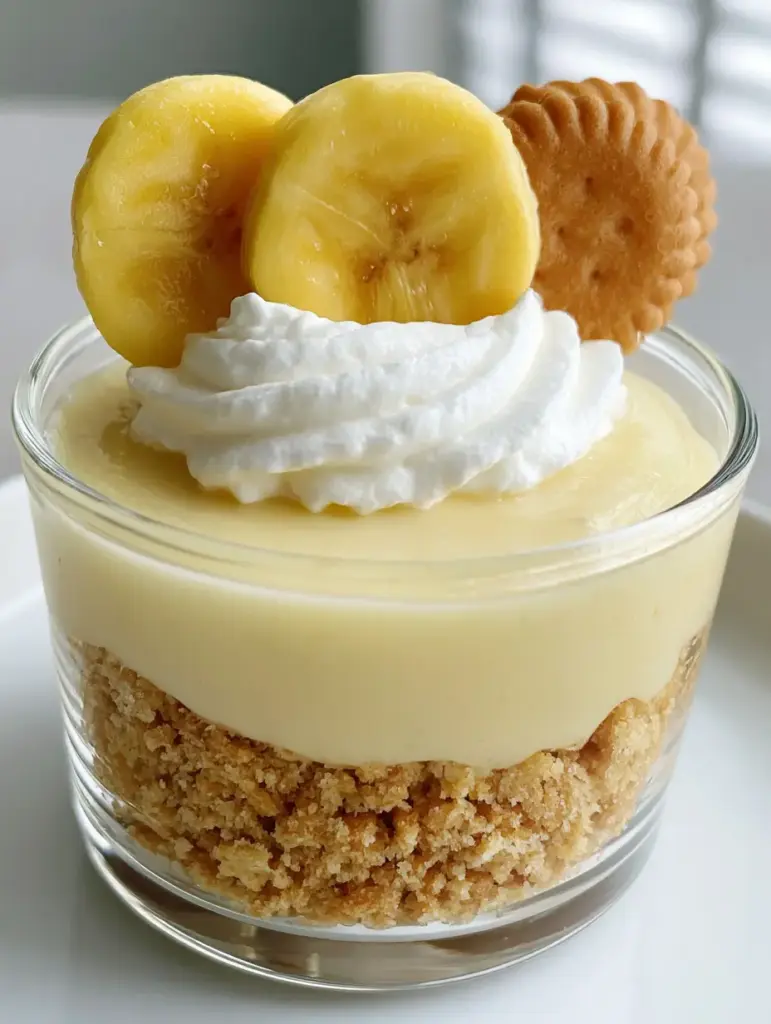
Spoon approximately 2-3 tablespoons of the mixture into the bottom of each clear glass cup. Use the back of a small spoon or a cocktail muddler to press the crumbs down firmly, creating a thick layer of golden, buttery crushed Nilla wafer crumbs. Visual Cue: Look for a solid, even foundation that doesn’t shift when you tilt the glass.
Step 2: Whip the Banana Cream filling
In a large mixing bowl, beat the softened cream cheese until it is completely smooth and fluffy. This should take about 3 minutes of high-speed mixing. In a separate bowl, whisk together the instant banana pudding mix and the cold milk for 2 minutes until thickened.
Slowly fold the pudding mixture into the cream cheese. Add the vanilla extract and continue to mix until the color is a uniform rich, smooth, pastel-yellow. Gently fold in the whipped topping to keep the filling light and airy. Sensory Cue: The mixture should smell intensely of sweet bananas and vanilla, with a texture like heavy silk.
Step 3: Assemble and Chill
Transfer the banana cream filling into a piping bag fitted with a large round tip. Pipe the filling over the crust in each cup, filling them about 3/4 of the way full. This ensures a clean look against the glass without smudging the sides. Smooth the tops with a small offset spatula if necessary.
Place the cups in the refrigerator for at least 4 hours, or ideally overnight. This chilling time is critical for the cheesecake to set and the flavors to meld together. Pro Tip: Do not add the fresh fruit garnish until just before serving to prevent browning.
Step 4: The Final Flourish
Just before you are ready to serve your Mini Banana Pudding Cheesecakes, prepare the toppings. Pipe a neat dollop of fluffy white whipped cream directly in the center of the yellow filling. Visual Cue: The cream should sit high and proud, creating a beautiful contrast.
Slice a fresh banana into 1/4 inch wheels. Place two fresh, perfectly sliced yellow banana wheels leaning against the whipped cream. Finally, tuck a whole mini Nilla wafer behind the bananas. The result should look like a handheld smartphone photo from a high-end dessert blog.
Expert Tips for Success
- Room Temperature is Key: Never try to beat cold cream cheese, or you will end up with tiny white lumps in your pastel-yellow filling.
- Prevent Banana Browning: Toss your banana slices in a tiny bit of lemon juice or pineapple juice before garnishing to keep them bright yellow for hours.
- Use a Piping Bag: For the cleanest layers in your clear glass cups, piping is much more effective than spooning the mixture.
- Quality Wafers: Use brand-name Nilla Wafers if possible, as they have the specific density required to hold up against the moisture of the cheesecake.
For a fruity variation, you might also enjoy my Strawberry Shortcake recipe which uses similar layering techniques!
Storage and Make-Ahead Instructions
To Store: These Mini Banana Pudding Cheesecakes can be stored in the refrigerator for up to 3 days. However, the crust will soften slightly over time as it absorbs moisture from the filling. Keep them covered with plastic wrap to prevent them from picking up other fridge odors.
Freezing: You can freeze the cheesecake portion (crust and filling) for up to one month. Thaw in the refrigerator for 4 hours before adding the fresh whipped cream and banana garnish.
What to Serve With Mini Banana Pudding Cheesecakes
These cheesecakes are quite rich, so they pair beautifully with a light, acidic beverage like a sparkling lemonade or a crisp iced coffee. If you are serving these at a brunch, consider pairing them with savory items like a quiche or a fresh fruit platter to balance the sweetness.
Frequently Asked Questions
Absolutely! Use paper liners in a muffin tin to create handheld cheesecake bites. The layering will be less visible, but they will be just as delicious.
Yes, you can fold in finely diced bananas, but be aware they may brown over time. For the best visual appeal, stick to the banana pudding mix for color and use fresh slices only for the topping.
Pressing the crust firmly and ensuring the butter is well-distributed creates a barrier. Serving the cheesecakes within 24 hours also ensures the best crunch.
Ensure your cream cheese is completely at room temperature and beat it alone first before adding any liquid ingredients to prevent lumping.
The Ultimate Mini Banana Pudding Cheesecake Recipe
Mini Banana Pudding Cheesecakes (Easy Individual Dessert Cups)
Ingredients
Equipment
Method
- Combine crushed Nilla wafers, melted butter, and sugar. Press a thick layer into the bottom of clear glass cups.
- Beat softened cream cheese until smooth. In a separate bowl, whisk milk and banana pudding mix. Fold the pudding and whipped topping into the cream cheese until pastel-yellow.
- Pipe the banana filling into cups over the crust. Refrigerate for at least 4 hours to set.
- Top with a dollop of whipped cream, two fresh banana wheels, and one mini Nilla wafer before serving.
Notes
Use a slight squeeze of lemon on the banana slices to prevent oxidation.
Share Your Creations with KellyTaste!
I can’t wait to see how your Mini Banana Pudding Cheesecakes turn out! If you make this recipe, please save it to your Pinterest “Dessert Recipes” board so you never lose it. Follow me at KellyTaste for more viral-inspired treats!
Did you love the creamy texture? Did the Nilla wafer crust satisfy your cravings? Leave a 5-star rating in the recipe card below and upload a photo of your individual cups in the comments. Your feedback helps our community of home cooks thrive!