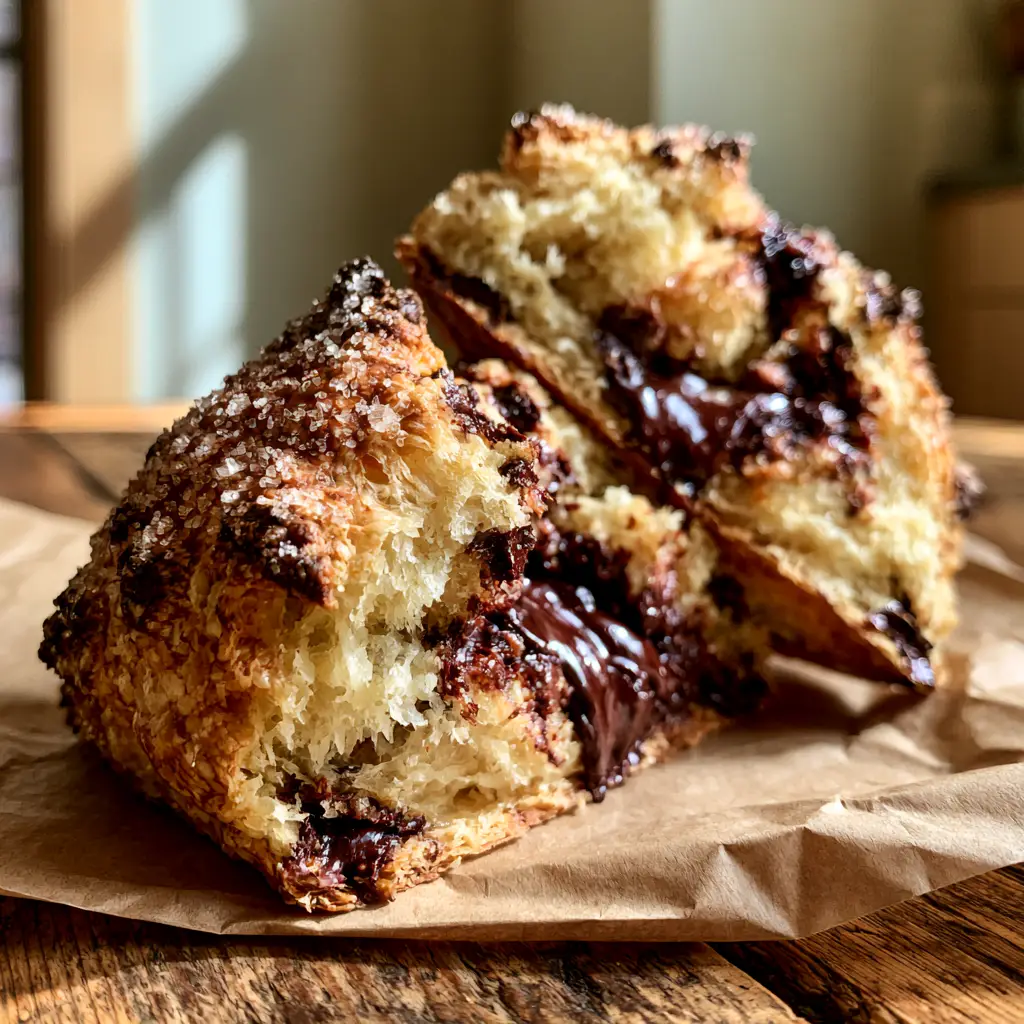
Chocolate chip scones are the ultimate morning luxury, combining the buttery, tender crumb of a professional pastry with the indulgent, gooey goodness of melted dark chocolate pockets. If you have ever felt intimidated by making scones at home, this recipe is designed to bridge the gap between a rustic kitchen bake and a high-end bakery display. We are focusing on creating that iconic golden-brown craggy scone crust that shatters slightly when you bite into it, revealing a flaky steaming interior pastry underneath.
There is something undeniably cozy about a warm scone resting on wrinkled brown parchment paper, especially when the sparkling coarse sugar on top catches the light. Whether you are serving these for a weekend brunch or as a mid-afternoon treat, the contrast between the cold-butter pastry and the rich, dark chocolate makes these absolutely irresistible. Unlike dry, crumbly scones of the past, this version stays moist and tender for days, provided you follow our cold-fat technique.
Why These Are the Best Chocolate Chip Scones You Will Ever Bake
- The Perfect Texture: We use a specific folding technique to create flaky steaming interior pastry layers that pull apart effortlessly.
- The Craggy Crust: A high-heat initial bake ensures a golden-brown craggy scone crust that provides a satisfying crunch.
- Intense Chocolate Flavor: By using dark chocolate chunks instead of standard chips, you get massive melted dark chocolate pockets in every single bite.
- Professional Finish: A generous dusting of coarse sugar crystals adds that signature bakery sparkle and a delightful texture.
If you love the combination of butter and chocolate, you might also want to try these chewy oatmeal chocolate chip cookies or perhaps these ultra-decadent fudgy homemade brownies for your next baking session.
The Science of Secret Ingredients for Fluffier Scones
All-Purpose Flour (500g / 4 cups): This provides the structural foundation. We want enough protein to hold the chocolate chip scones together without making them tough or bread-like.
Unsalted European-Style Butter (225g / 1 cup): High-fat butter is the secret to those flaky steaming interior pastry layers. It must be kept stone-cold until it hits the oven.
Heavy Cream (240ml / 1 cup): The high fat content in heavy cream creates a much more tender crumb than milk or buttermilk ever could, resulting in a melt-in-your-mouth experience.
Dark Chocolate Chunks (170g / 1 cup): Using high-quality dark chocolate (60% cacao or higher) creates those sophisticated melted dark chocolate pockets that balance the sweetness of the dough.
Coarse Sparkling Sugar (25g / 2 tbsp): This is non-negotiable for achieving that professional golden-brown craggy scone crust. It doesn’t melt in the oven, providing a permanent crunch.
Baking Powder (15g / 1 tbsp): A significant amount is needed to give these scones their signature high-rise and airy, non-dense interior.
Mastering the Cold-Butter Technique for Maximum Flakiness
Step 1: The Dry Mix & Butter Incorporation
Start by whisking your flour, sugar, baking powder, and salt in a large chilled bowl. The goal is to keep everything cold. Take your frozen butter and use a box grater to shred it directly into the flour. This creates tiny “petals” of fat that will eventually steam and expand, creating those flaky steaming interior pastry layers.
Gently toss the butter shreds with the flour using two forks or a pastry cutter. You want the mixture to look like coarse meal with some pea-sized lumps still visible. If the butter starts to feel soft, pop the bowl in the freezer for 10 minutes before moving to the next step. Keeping the fat solid is the only way to ensure chocolate chip scones don’t turn into flat puddles.
Step 2: Hydration and the Chocolate Fold
Make a well in the center of your dry ingredients and pour in the cold heavy cream and vanilla extract. Use a silicone spatula to fold the dough gently. When it is about 70% combined, add your dark chocolate chunks. You want to see abundant pockets of glossy, gooey melted dark chocolate in the final product, so don’t be afraid to be generous here.
Turn the shaggy mass onto a piece of wrinkled brown parchment paper. Do not overwork the dough! Kneading will develop gluten, which makes scones tough. Instead, pat the dough into a rectangle, fold it in half, and pat it down again. Repeat this three times. This “letter fold” method is the secret to a bakery-style flaky interior.
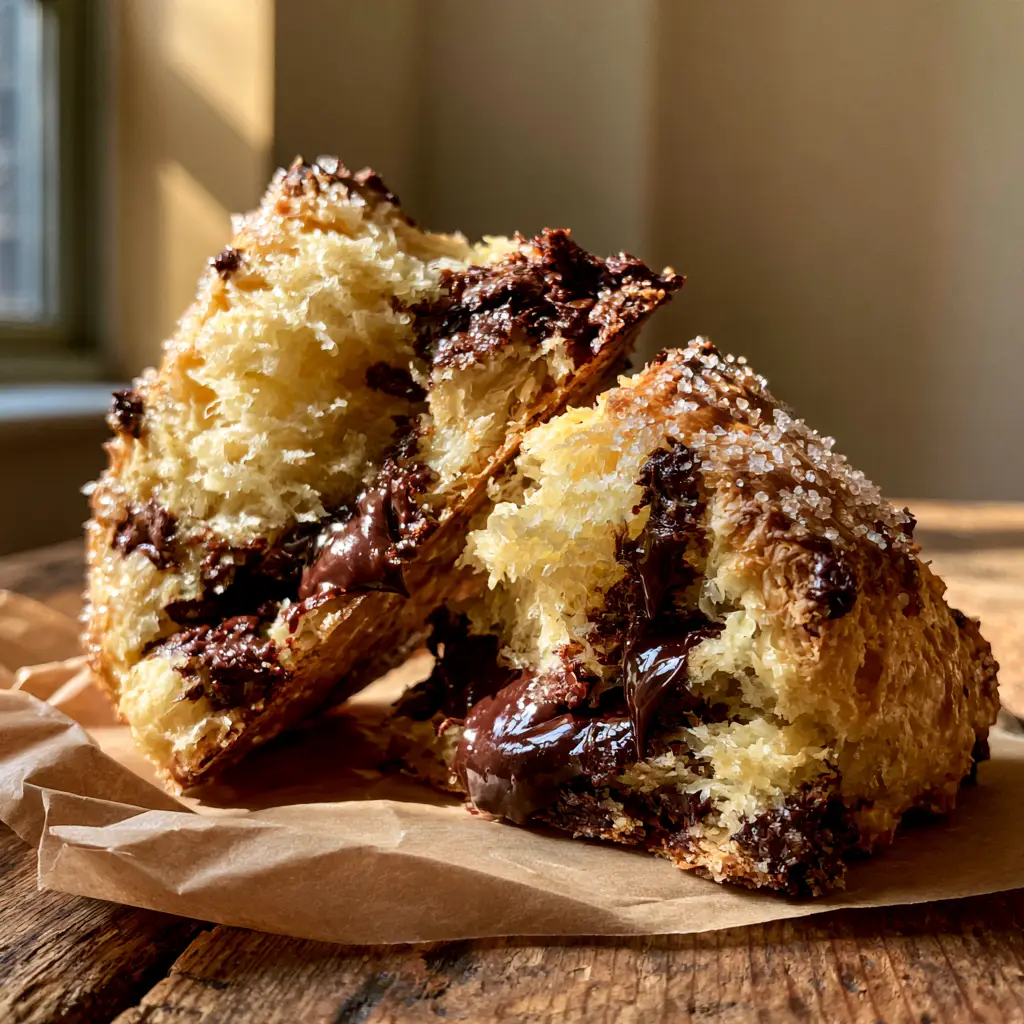
Step 3: Shaping and the Final Chill
Pat the dough into a 1-inch (2.5cm) thick disc. Use a sharp knife or a bench scraper to cut the disc into 8 even wedges. Separating them slightly on the wrinkled brown parchment paper allows the heat to circulate, creating that all-around golden-brown craggy scone crust.
Pro Tip: Place the entire tray of chocolate chip scones in the refrigerator for at least 30 minutes before baking. Chilling the dough relaxes the gluten and ensures the butter is solid, which prevents spreading and maximizes the rise.
Step 4: The High-Heat Bake
Brush the tops of the chilled scones with a little extra heavy cream and generously sprinkle the coarse sugar crystals over the top. Bake at 400°F (200°C) for 18-22 minutes. You are looking for a deep, golden-brown crust and for the chocolate to be visibly glossy and gooey.
If you enjoy these, you might also love our bakery-style chocolate muffins which use a similar high-heat method for those perfectly domed tops.
Expert Tips for Success
- Use Frozen Butter: Grating frozen butter is easier and ensures the fat stays cold longer during the mixing process.
- Don’t Overmix: Stop mixing as soon as the dough holds together. A shaggy dough is a tender dough.
- Check Your Leavening: Ensure your baking powder isn’t expired, as these chocolate chip scones rely heavily on it for their lift.
- Cold Cream is Key: Just like the butter, your heavy cream should be pulled from the fridge at the very last second.
For more chocolate-heavy treats, check out our classic chocolate chip cookies or these unique banana pudding brownies.
Storage, Reheating & Freezing Instructions
Room Temperature: Store these chocolate chip scones in an airtight container for up to 2 days. To revive the craggy crust, pop them in a toaster oven for 3-5 minutes at 350°F (175°C).
Freezing (Unbaked): You can freeze the shaped, unbaked wedges. Bake them straight from the freezer, adding 3-5 minutes to the total baking time. This is the best way to have fresh chocolate chip scones on demand!
Freezing (Baked): Wrap individual cooled scones in plastic wrap and store in a freezer bag for up to 3 months. Thaw at room temperature and reheat in the oven to restore the flaky steaming interior pastry layers.
What to Serve With These Bakery-Style Scones
These scones are decadent enough to stand alone, but they pair beautifully with a dollop of clotted cream or salted butter. The saltiness of the butter highlights the melted dark chocolate pockets perfectly. If you are hosting a tea party, serve them alongside these strawberry shortcake muffins for a beautiful spread of textures and colors.
Frequently Asked Questions About Chocolate Chip Scones
Absolutely! You can shape the wedges and keep them in the fridge overnight or freeze them for up to 3 months, baking them fresh whenever you’re ready.
Yes, but dark chocolate chunks are recommended for those large, gooey melted chocolate pockets seen in bakery-style scones. Chips contain stabilizers that prevent them from melting as much.
For the best texture, yes. The high fat content in heavy cream creates the tender, flaky layers that milk or buttermilk cannot replicate.
Scones become dry if you overbake them or add too much flour. To ensure a moist crumb, use heavy cream and take them out of the oven as soon as the tops are golden brown.
This usually happens if your baking powder is expired or if the butter was too warm. Keeping the butter frozen and chilling the dough before baking is crucial for a tall rise.
The Ultimate Chocolate Chip Scone Recipe Card
Chocolate Chip Scones: The Ultimate Flaky Bakery-Style Recipe
Ingredients
Equipment
Method
- Whisk flour, granulated sugar, baking powder, and salt in a large bowl.
- Grate frozen butter into the dry ingredients and toss gently with a fork until pea-sized crumbs form.
- Pour in cold heavy cream and vanilla, mixing until a shaggy dough forms. Fold in dark chocolate chunks.
- Turn dough onto parchment paper, pat into a rectangle, and fold in half 3 times to create layers.
- Cut into 8 wedges and refrigerate for 30 minutes to ensure a high rise.
- Brush with cream, sprinkle with coarse sugar, and bake at 400°F (200°C) for 18-22 minutes until golden brown.
Notes
Do not overwork the dough or the scones will become tough.

Save This Recipe to Pinterest!
If you loved these chocolate chip scones, please click the Save button on the image above to add it to your “Breakfast Ideas” or “Baking Recipes” board on Pinterest! Following KellyTaste helps us bring you more elite-level recipes every week.
Did you make these? Leave a 5-star rating in the recipe card above and upload a photo of your golden-brown craggy scone crust in the comments below. We love seeing your kitchen success!