Perfect cake pops are the holy grail of handheld desserts, offering that iconic combination of a dense, fudgy center and a crisp, snap-able candy shell. If you have ever stared longingly at the bakery case for a pink treat, this recipe is for you.
Making perfect cake pops at home doesn’t have to be a struggle involving cracked shells or falling sticks. By focusing on the moisture level of the pastel-pink vanilla cake interior and the temperature of your light pink candy coating, you can achieve professional results every single time.
Whether you are preparing these for a birthday party or just looking to master your cake-pop-recipes collection, this guide will walk you through the forensic details of creating a flawless, glossy sphere that looks like it stepped right out of a high-end cafe.
Why These Are The Only Perfect Cake Pops You’ll Ever Need
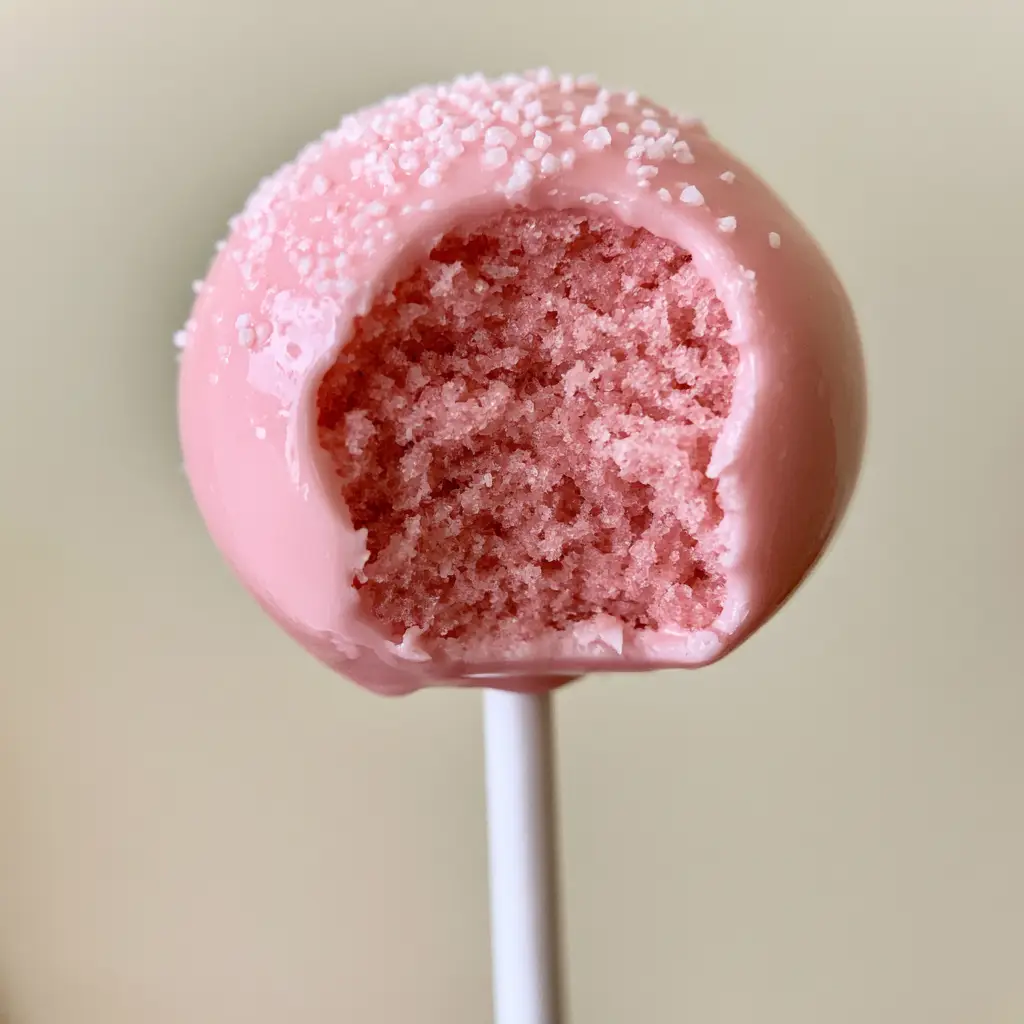
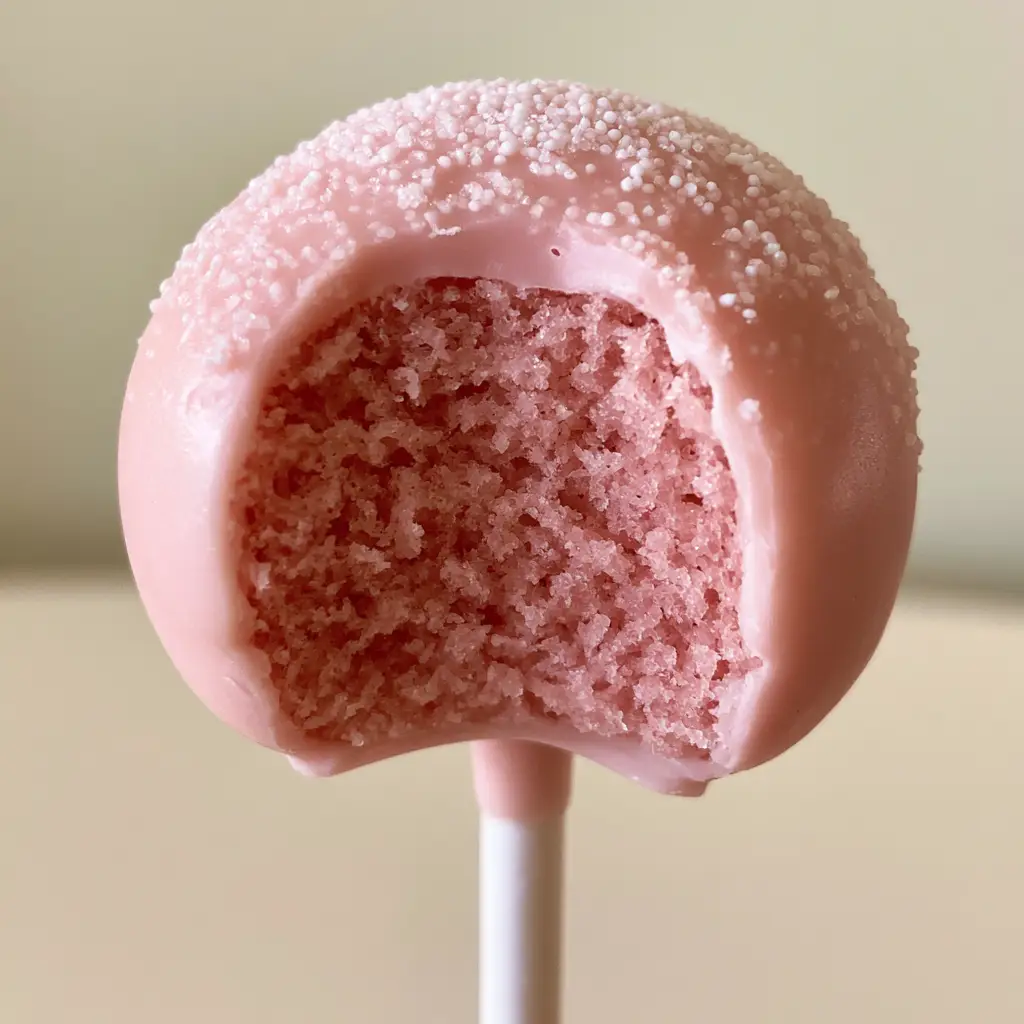
- The Texture: A dense, moist, pastel-pink vanilla cake interior that melts in your mouth without being “mushy.”
- The Finish: A flawlessly smooth, medium-thick light pink candy shell that provides a satisfying snap.
- The Aesthetic: Adorned with delicate white sugar sprinkles on a clean white paper stick for that classic, upscale look.
- The Flavor: A nostalgic, high-quality vanilla bean profile that elevates these perfect cake pops above the standard sugar-bomb.
Essential Ingredients for a Moist Pink Interior
To create perfect cake pops, you must start with a high-quality base. We aren’t just using scraps; we are building a cake specifically designed to be crumbled and reconstructed.
Cake Flour: 1.5 cups (185g) of cake flour provides a tighter, more tender crumb than all-purpose flour, ensuring the interior isn’t grainy.
Unsalted Butter: 0.5 cups (113g) at room temperature creates a rich, buttery foundation for the vanilla notes to shine.
Granulated Sugar: 1 cup (200g) for sweetness and to assist in the “creaming” process for a light, airy initial bake.
Pink Gel Food Coloring: A tiny drop is needed to achieve that specific pastel-pink hue without changing the chemical consistency of the batter.
Vanilla Bean Paste: 1 tablespoon (15ml) for those beautiful black flecks and a deep, authentic vanilla aroma.
Whole Milk: 0.5 cups (120ml) adds the necessary fat and moisture to keep the cake from drying out during the second stage of assembly.
Vanilla Frosting: 0.25 to 0.5 cups (60g-120g) of high-quality buttercream to act as the “glue” for your perfect cake pops.
Pink Candy Melts: 12 ounces (340g) of premium light pink coating wafers for that signature glossy shell.
White Sugar Sprinkles: Tiny nonpareils or granulated sugar to add the final delicate dusting.
The Secret to the Perfect Pink Vanilla Cake Base
Creaming for Structure
Start by creaming your softened butter and sugar together for at least 3-5 minutes. You want the mixture to be pale and fluffy. This creates the structural integrity needed to hold the perfect cake pops together on their sticks later.
Achieving the Pastel Pink Hue
Add your eggs one at a time, followed by the vanilla bean paste. Use a toothpick to add a minuscule amount of pink gel coloring. Remember, the color deepens slightly when baked and again when mixed with frosting, so aim for a soft, light pastel shade.
The Gentle Fold
Alternating between your dry ingredients and the milk, mix until just combined. Over-mixing leads to a tough cake, and for perfect cake pops, we want a dense but tender bite. Bake at 350°F (175°C) for 25-30 minutes until a toothpick comes out clean.
Mastering the Cake Pop Assembly Process
The “Fine Crumb” Technique
Once the pink cake has cooled completely, trim off any browned edges. You only want the vibrant pink interior. Break the cake into small chunks and rub them together between your palms until you have a pile of fine, sand-like crumbs. No large lumps allowed!
Finding the Ratio
Add your frosting one tablespoon at a time. The goal for perfect cake pops is a consistency similar to play-dough. It should hold its shape when rolled into a sphere without sticking to your hands. If it’s too wet, they will fall off the stick; too dry, and they will crack.
Rolling Perfect Spheres
Use a small cookie scoop to ensure every pop is the same size. Roll the mixture between your palms until you have a flawlessly smooth sphere. Place them on a parchment-lined tray and chill in the refrigerator for 30-60 minutes. Do not freeze them, as the extreme temperature change causes the outer shell to crack.
Diiping and Decorating Like a Professional
The Stick Anchor
Melt a small amount of your pink candy coating. Dip the tip of a white paper stick into the coating, then insert it about halfway into the chilled cake ball. This acts as a “glue” to ensure your perfect cake pops don’t slide down the stick during the final dip.
The “One-Dip” Glossy Shell
Ensure your melted candy coating is in a deep, narrow microwave-safe glass. This allows for a full vertical submerge. Dip the pop straight down until the cake is completely covered and the coating meets the stick. Do not stir the pop in the liquid.
The Perfect Drip
Lift the pop straight up and gently tap your wrist—not the stick—to remove excess coating. Rotate the pop slowly to ensure the shell stays smooth and glossy. Before the coating sets, add a delicate dusting of white sugar sprinkles.
If you enjoy this process, you might also love making a strawberry shortcake cake or exploring our other cake pop recipes for different flavor profiles.
Expert Tips for Success
- Avoid the Crack: Ensure your cake balls are chilled but not ice-cold when you dip them. A massive temperature difference between the cold cake and warm candy coating is the #1 cause of cracking.
- Thin the Coating: If your pink candy melts are too thick, add a teaspoon of vegetable shortening or coconut oil to achieve that medium-thick, flowy consistency.
- The Drying Block: Use a Styrofoam block or a box with holes to keep the perfect cake pops upright while they set. This prevents flat sides.
- The Bite Reveal: For the best Pinterest-worthy photos, wait for the shell to harden completely before taking a clean bite to reveal the dense pink interior.
Storage, Reheating & Freezing
Storage: Keep your perfect cake pops in an airtight container in the refrigerator for up to 5 days. The candy shell protects the moist interior, keeping it fresh.
Room Temperature: They are best served at room temperature for the softest interior texture, so take them out of the fridge about 30 minutes before serving.
Freezing: You can freeze the undipped cake balls for up to 3 months. Once dipped, freezing is not recommended as the shell may “sweat” upon thawing, ruining the glossy finish.
What to Serve With This
These perfect cake pops are a standout dessert on their own, but they pair beautifully with a light, fruity strawberry puree drizzled over a side of vanilla bean ice cream. If you are hosting a dessert bar, consider serving them alongside banana pudding brownies or a classic Italian love cake for a variety of textures.
Frequently Asked Questions
Yes, you can use a white or vanilla mix and add pink gel food coloring. Just ensure you bake it fully and cool it completely before crumbling to maintain the dense texture.
To get a flawlessly smooth shell, ensure your coating is fluid (add a little shortening if needed). Dip in one motion, and tap your wrist gently to remove excess without creating air bubbles.
Start with a 4:1 ratio of cake crumbs to frosting. The mixture should feel like moist dough that holds its shape when rolled but doesn’t stick to your hands like a paste.
Cracking is usually caused by a drastic temperature difference. If the cake balls are too cold (frozen) and the candy coating is too warm, the shell will expand and crack as the temperature equalizes.
The Official Perfect Pink Cake Pop Recipe
Perfect Cake Pops: The Ultimate Starbucks-Style Pink Vanilla Recipe
Ingredients
Equipment
Method
- Cream butter and sugar, add vanilla and pink coloring, mix with flour and milk, and bake at 350°F (175°C) for 25-30 mins.
- Crumble cooled cake into fine crumbs, mix with frosting until a play-dough consistency is achieved.
- Roll into 20 spheres, chill, dip sticks in pink coating, insert into balls, then dip the whole ball into the glossy shell and top with white sprinkles.
Notes
Tap your wrist gently to remove excess coating for a smooth finish.
Show Us Your Perfect Cake Pops!
Did you master the glossy pink shell? We want to see your results! Save this recipe to your Pinterest boards so you never lose the secret to the dense, moist interior. Follow KellyTaste for more viral dessert inspiration, and please leave a 5-star rating and a photo in the comments below if you loved these perfect cake pops!
If you’re looking for more pink inspiration, don’t miss our strawberry shortcake cake pops for a fruity twist on this classic technique!