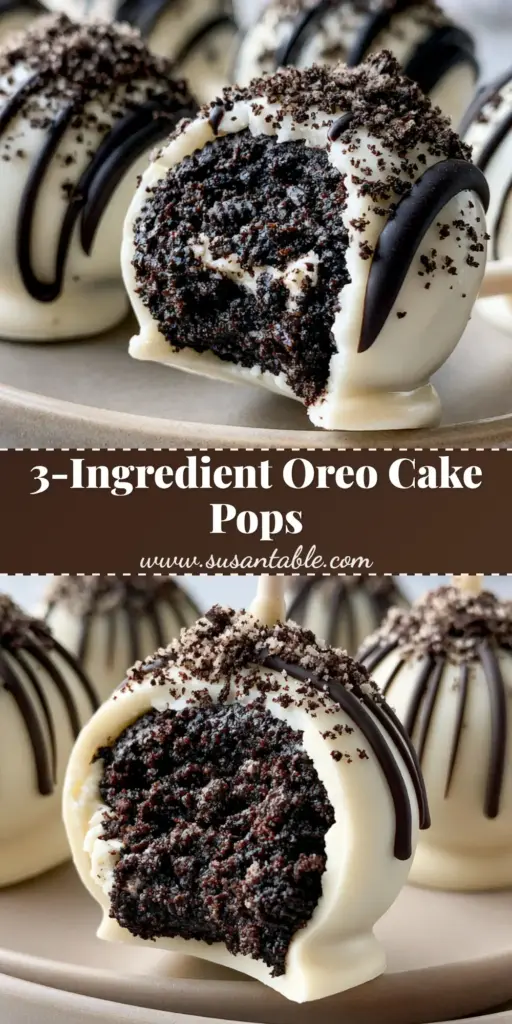
Oreo cake pops are the quintessential crowd-pleasing dessert, combining the nostalgic crunch of chocolate sandwich cookies with a decadent, truffle-like texture. These handheld treats are a staple for birthday parties, weddings, and holiday dessert tables because they offer a sophisticated gourmet look without requiring hours in front of a hot oven.
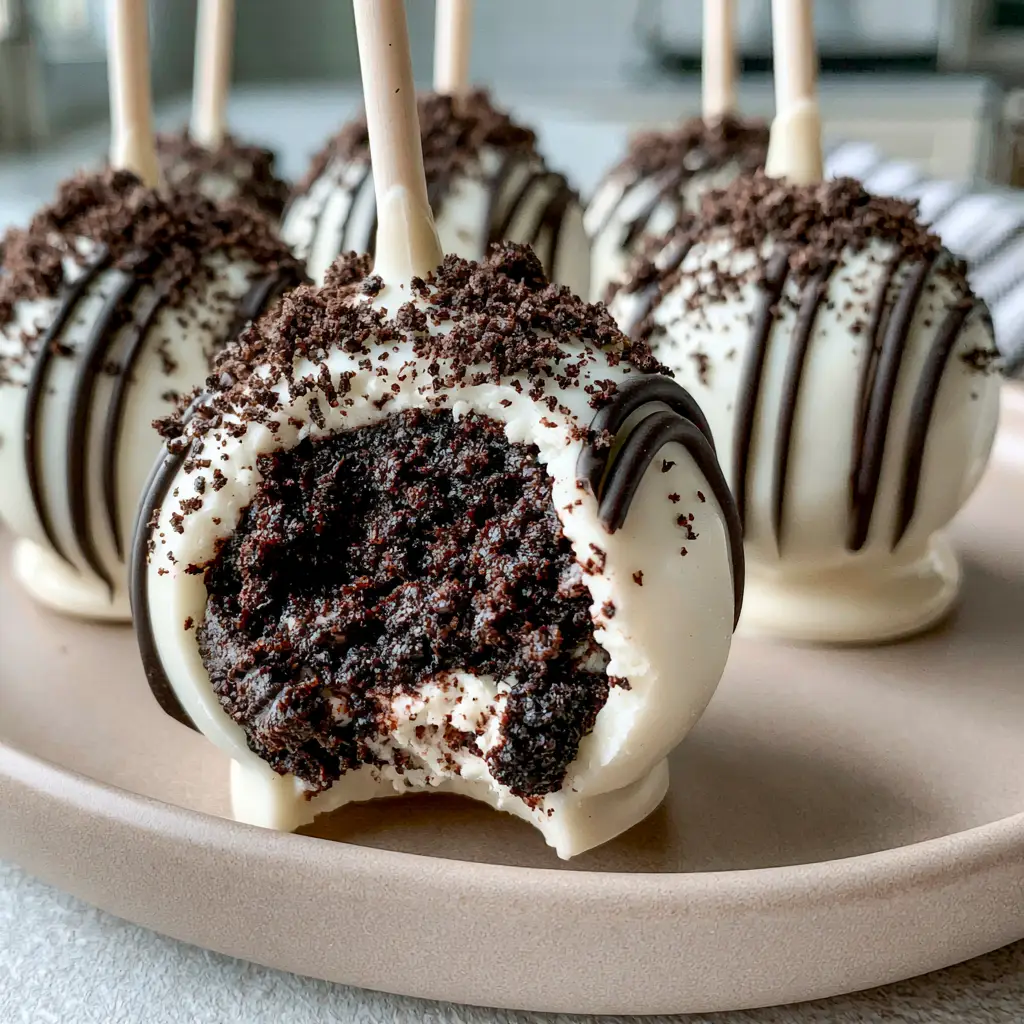
The secret to a truly exceptional oreo cake pops recipe lies in the contrast between the crisp, glossy white chocolate outer shell and the dense, moist, ultra-fudgy dark chocolate center. When you take that first bite, the shell snaps perfectly to reveal a rich interior that melts on your tongue.
Whether you are a seasoned baker or a kitchen novice, these pops provide a high-reward result for minimal effort. Unlike a traditional moist strawberry cake that requires precise oven temperatures, these no-bake wonders rely on simple mechanical mixing and temperature control for the chocolate coating.
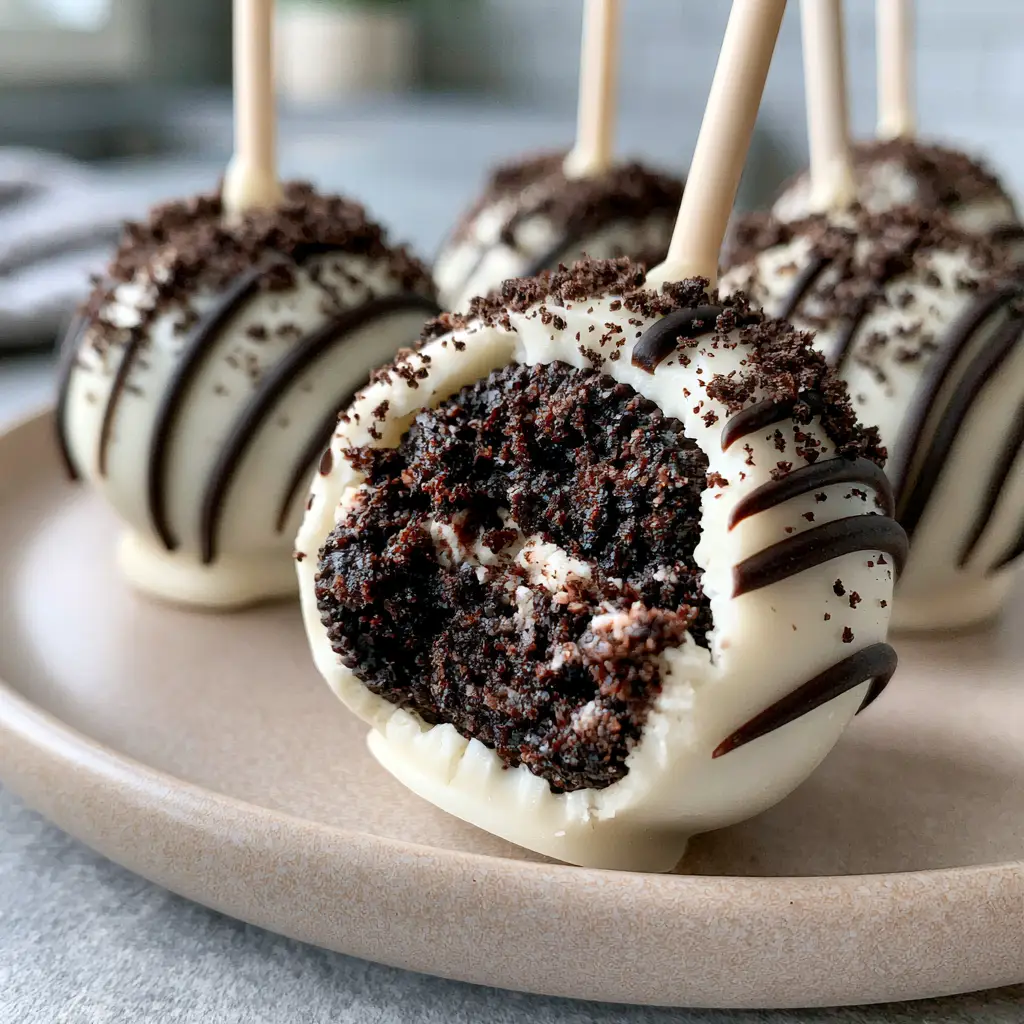
Why You Will Obsess Over These Fudgy Oreo Treats
- The Ultimate Texture: A dense, brownie-like fudgy center that stays moist for days.
- Visual Sophistication: A perfectly smooth, glossy white chocolate coating decorated with professional dark chocolate drizzles.
- No-Bake Ease: Skip the oven entirely and achieve a gourmet result using only a food processor and a microwave.
- Customizable: While we love the classic dark and white contrast, this base works as well as my fudgy brownies for satisfying deep chocolate cravings.
- Kid-Approved: These are the perfect size for little hands and are always the first item to disappear at a party.
The Gourmet Ingredient List for Oreo Cake Pops
To achieve that signature “Visual Recipe Blueprint” look, we need high-quality ingredients that behave predictably during the dipping and drizzling process. Here is what you need to gather.
The Fudgy Center Components
Oreo Cookies: 36 standard Oreos (about 14.3 oz / 405g). You need the standard filling, not Double Stuf, to ensure the ratio of cookie to cream remains balanced for structural integrity.
Cream Cheese: 8 oz (226g) of full-fat brick cream cheese. This must be softened to room temperature to ensure a smooth, lump-free integration with the cookie crumbs.
The Professional Coating and Decor
White Chocolate or Candy Melts: 16 oz (450g) of high-quality white chocolate wafers. This creates that perfectly smooth, glossy white chocolate candy coating mentioned in our blueprint.
Dark Chocolate Drizzle: 2 oz (56g) of dark chocolate chips or melting wafers. This provides the sophisticated visual contrast and a slightly bitter edge to cut the sweetness of the white chocolate.
Refined Coconut Oil: 1-2 teaspoons (5-10ml). This is an “invisible” professional secret; it thins the chocolate just enough to create a thin, even shell that won’t crack when you bite into it.
Extra Oreo Crumbs: 2-3 cookies, finely crushed. These are for the final dusting, adding texture and flavor reinforcement to the exterior.
Step-By-Step: Engineering the Perfect Oreo Cake Pop
Follow these phases carefully to ensure your oreo cake pops look like they came from a high-end patisserie rather than a home kitchen.
Phase 1: Creating the Fudgy Dark Chocolate Filling
Start by placing your 36 Oreo cookies into a food processor. Pulse until the cookies reach a fine, sandy crumb consistency. There should be no large chunks remaining. If you don’t have a food processor, place them in a heavy-duty freezer bag and crush them with a rolling pin.
Add the softened cream cheese to the crumbs. Pulse again until the mixture forms a cohesive, heavy dough. It should look like dense, moist, ultra-fudgy dark chocolate. You are looking for a texture similar to a thick ganache or raw brownie batter. If you are mixing by hand, use a sturdy spatula to fold the cream cheese into the crumbs until no white streaks remain.
Phase 2: Portioning and Rolling
Use a small cookie scoop or a tablespoon to portion out the dough. You want each ball to be roughly 1 inch (2.5cm) in diameter. Roll the mixture between your palms to create perfectly smooth spheres. Place them on a parchment-lined baking sheet.
CRITICAL STEP: Place the rolled balls in the freezer for 15-20 minutes. They need to be firm enough to hold a stick but not frozen solid. If they are too cold, the chocolate shell will crack as the center expands slightly while coming back to room temperature.
Phase 3: The Dipping Process
Melt your white chocolate in a deep, narrow microwave-safe bowl. Heat in 30-second intervals, stirring vigorously in between, until the chocolate is smooth and glossy. Stir in the coconut oil to achieve the ideal dipping viscosity.
Dip the tip of a lollipop stick (about 1/2 inch or 1.25cm) into the melted chocolate, then insert it halfway into an Oreo ball. This acts as “glue” to prevent the pop from sliding off the stick. Immediately dip the entire ball into the white chocolate, submerging it completely. Lift it straight up and gently tap your wrist to let the excess chocolate drip back into the bowl.
Phase 4: Decoration and Drizzle
While the white shell is still wet, you can add a light dusting of finely crushed Oreo cookie crumbs. However, for the specific gourmet look in our blueprint, we wait for the white shell to set (about 5-10 minutes) before adding the dark chocolate drizzle.
Melt the dark chocolate and transfer it to a small piping bag or a sandwich bag with a tiny corner snipped off. Use a swift, fluid motion to create delicate lines across the pops. This technique is similar to how we finish our coffee cake cookies for that bakery-style aesthetic.
Expert Tips for Success
- Temperature Control: Never dip a frozen cake pop into hot chocolate. The thermal shock will cause the white chocolate shell to crack within minutes. Aim for “chilled” centers and “warm” (not hot) chocolate.
- The Tapping Technique: When removing excess chocolate, tap your wrist, not the stick itself. This provides a gentler vibration that smooths the coating without dislodging the ball.
- Stay Centered: If your balls are lopsided, the weight will cause them to fall off the stick. Ensure the stick is inserted perfectly straight.
- Quality Matters: Use a brand like Ghirardelli or Guittard for the coating. Cheap chocolate chips contain stabilizers that prevent them from melting smoothly, which will ruin the gourmet Oreo cake pops appearance.
Storage, Reheating & Freezing
Refrigerator: Store your finished oreo cake pops in an airtight container in the fridge for up to 7 days. Because of the cream cheese center, they must remain refrigerated for food safety.
Freezer: These pops freeze beautifully. Place them in a single layer in a freezer-safe bag for up to 2 months. Thaw them overnight in the refrigerator before serving. Do not thaw at room temperature, as condensation will form on the chocolate shell, making it “sweat.”
What to Serve With This
These pops are rich and decadent, so they pair best with beverages that provide a clean palate cleanse. A cold glass of milk is the classic choice, but for a sophisticated party, consider serving them alongside a warm cup of coffee or a tart berry coulis. If you are building a full dessert spread, they complement a Lotus Biscoff cake or a platter of pumpkin chocolate chip cookies perfectly.
Frequently Asked Questions
It is not recommended. The extra cream in Double Stuf Oreos makes the mixture too oily and soft, which can cause the pops to lose their shape or fall off the sticks.
No! The cream filling provides the necessary moisture and sweetness. Simply pulse the entire cookie (wafer and cream) in the food processor.
Stir in a teaspoon of refined coconut oil or cocoa butter to the melted chocolate. This thins the consistency, allowing excess chocolate to drip off easily for a smooth finish.
This usually happens if the balls were not chilled enough before dipping, or if the ball is too heavy. Ensure you dip the stick in chocolate before inserting it into the ball to act as a ‘glue’.
Cracking occurs due to extreme temperature changes. If the Oreo balls are frozen and the chocolate is very hot, the center will expand as it warms, cracking the shell. Use chilled (not frozen) balls and warm chocolate.
The Official Oreo Cake Pops Recipe Card
Oreo Cake Pops: The Ultimate Fudgy No-Bake Gourmet Treat
Ingredients
Equipment
Method
- Pulse 36 Oreo cookies in a food processor until they become fine crumbs.
- Add softened cream cheese and pulse until a dense, moist, dark chocolate dough forms.
- Roll the dough into 1-inch (2.5cm) spheres and place on a parchment-lined tray.
- Place the tray in the freezer for 15-20 minutes to firm up.
- Melt white chocolate with coconut oil in 30-second bursts until smooth and glossy.
- Dip a stick in chocolate, insert into a ball, then submerge the entire ball in white chocolate.
- Once set, drizzle with melted dark chocolate and sprinkle with fine Oreo crumbs.
Notes
Do not freeze the balls solid before dipping, or the chocolate will crack.
Join the KellyTaste Community!
Did you make these oreo cake pops? I want to see your gorgeous creations! These pops are designed to be the star of your Pinterest boards, so don’t forget to snap a photo of your handheld smartphone photo style results and share them in the comments below.
Pin this recipe to your “Dessert Goals” board so you never lose it! If you loved the fudgy center and the snappy shell, please leave a 5-star rating on the recipe card above. For more gourmet inspiration, follow me for weekly recipes that look as good as they taste!