When it comes to elevating simple mushroom recipes, the difference between a soggy side dish and a culinary masterpiece lies in the technique of the dry-sear. This method transforms the humble cremini mushroom into a meaty, umami-rich powerhouse with a caramelized golden-brown crust that rivals any steak. By allowing the mushrooms to release their moisture and brown undisturbed in a hot cast iron skillet, we unlock a depth of flavor that is often lost in traditional sautéing.
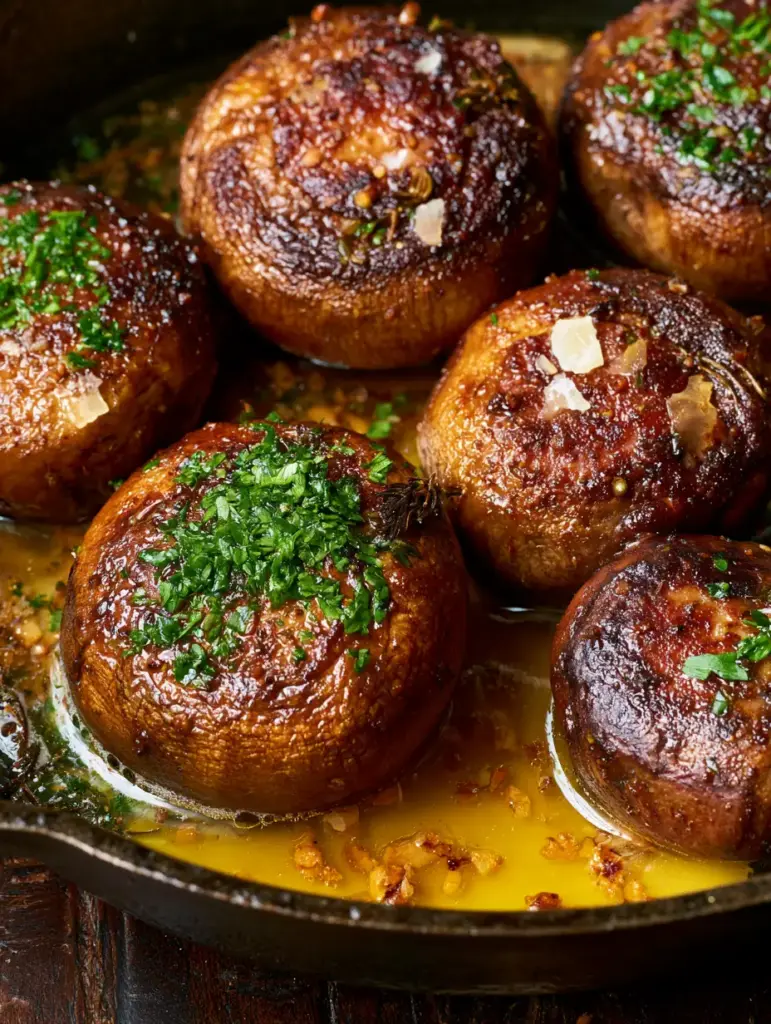
Imagine a whole roasted cremini mushroom with a deep golden-brown, crispy exterior that feels firm and meaty to the bite. As you approach the skillet, you see pools of melted, golden garlic butter simmering around the base, dotted with tiny flecks of minced toasted garlic. This isn’t just a side dish; it is a sensory experience defined by the aromatic fragrance of fresh thyme and the crunch of Maldon sea salt flakes.
Whether you are a seasoned home cook or just beginning your journey into mushroom recipes, this guide will provide the professional science and forensic culinary detail needed to achieve restaurant-quality results every single time. Get ready to master the cast iron and redefine what a mushroom can be.
Why These Crispy Garlic Butter Mushrooms Stand Out
- Unmatched Texture: Unlike wet sautéed mushrooms, these are dry-seared to create a firm, crispy exterior that is never rubbery or slimy.
- Maillard Reaction Excellence: We prioritize high-heat caramelization to develop a deep, nutty flavor profile that enhances the natural earthiness of the fungi.
- Aromatic Depth: The combination of fresh thyme sprigs and minced roasted garlic creates a lingering fragrance that permeates every crevice of the mushroom caps.
- Visual Sophistication: Finished with a heavy dusting of fresh flat-leaf parsley and large Maldon sea salt flakes, this dish is as beautiful as it is delicious.
The Anatomy of Perfect Mushroom Recipes: Ingredients Explained
To achieve the visual and textural perfection seen in high-end food photography, every ingredient serves a specific structural or flavor-based purpose. Here is what you will need for this masterclass in mushroom recipes.
1 lb (450g) Whole Cremini Mushrooms: Also known as baby bellas, these provide a denser structure and more robust flavor than white button mushrooms. Keep them whole to preserve their meaty interior and provide more surface area for that golden-brown crust.
3 tbsp (42g) Unsalted Butter: This provides the rich, silky base for our garlic sauce and aids in the final stage of browning. We use unsalted to have total control over the sodium levels, especially since we finish with flaky salt.
1 tbsp (15ml) Neutral High-Smoke Point Oil: While the sear starts dry, a touch of avocado or grapeseed oil ensures the mushrooms don’t stick once they begin to caramelize. It acts as a heat conductor between the cast iron and the mushroom skin.
4 Cloves Garlic, Minced: We use fresh garlic to ensure those tiny toasted flecks visible in the skillet. This adds both a pungent aromatic quality and a slight crunch to the finished butter sauce.
4-5 Fresh Thyme Sprigs: Thyme contains essential oils that are released under heat, providing a woody, floral note that is the classic pairing for earthy mushroom recipes.
2 tbsp (8g) Fresh Flat-Leaf Parsley, Finely Chopped: Parsley provides a necessary burst of chlorophyll and freshness to cut through the richness of the garlic butter. Its bright green color creates a stunning visual contrast against the dark mahogany mushrooms.
1 tsp (5g) Maldon Sea Salt Flakes: These large, pyramid-shaped crystals provide a distinct “crunch” and a clean saltiness that doesn’t dissolve immediately into the dish. They are the crowning glory of the visual presentation.
1/2 tsp (2g) Freshly Cracked Black Pepper: Provides a subtle heat and builds the foundational spice profile of the dish.
Essential Equipment for a Professional Sear
To replicate the authentic food blogger aesthetic and the perfect sear, your choice of tools is non-negotiable. You need equipment that can handle and retain high heat efficiently.
Heavy-Duty Cast Iron Skillet: This is the most critical tool. Cast iron provides superior heat retention, which is necessary to evaporate mushroom moisture quickly and create that crispy, seared texture.
High-Heat Silicone or Metal Spatula: You need a tool that can scrape the fond (the browned bits) off the bottom of the pan without melting. This ensures every bit of flavor stays with the mushrooms.
Sharp Chef’s Knife: Essential for finely mincing the garlic and parsley to achieve the “tiny fleck” appearance described in the visual blueprint.
The Step-by-Step Guide to Searing Perfection
1. Preparing the Fungi for Heat
Clean your 1 lb (450g) of cremini mushrooms using a damp paper towel rather than rinsing them under water. Mushrooms act like sponges; if they absorb water, they will steam instead of sear, ruining the crispy exterior we are aiming for in these mushroom recipes.
2. The Initial Dry-Sear Technique
Place your cast iron skillet over medium-high heat until it is wispy-hot. Add the whole mushrooms to the dry pan in a single layer. Do not crowd the pan; if necessary, work in batches to ensure each mushroom has space to breathe and release steam.
3. Achieving the Golden-Brown Crust
Let the mushrooms sit undisturbed for 4-5 minutes. You will hear a loud sizzling sound—this is the moisture leaving the mushroom. Once they have developed a deep golden-brown, seared texture on one side, give them a toss. Continue this process until the exterior is crispy and looks meaty and firm.
4. Infusing the Garlic Butter
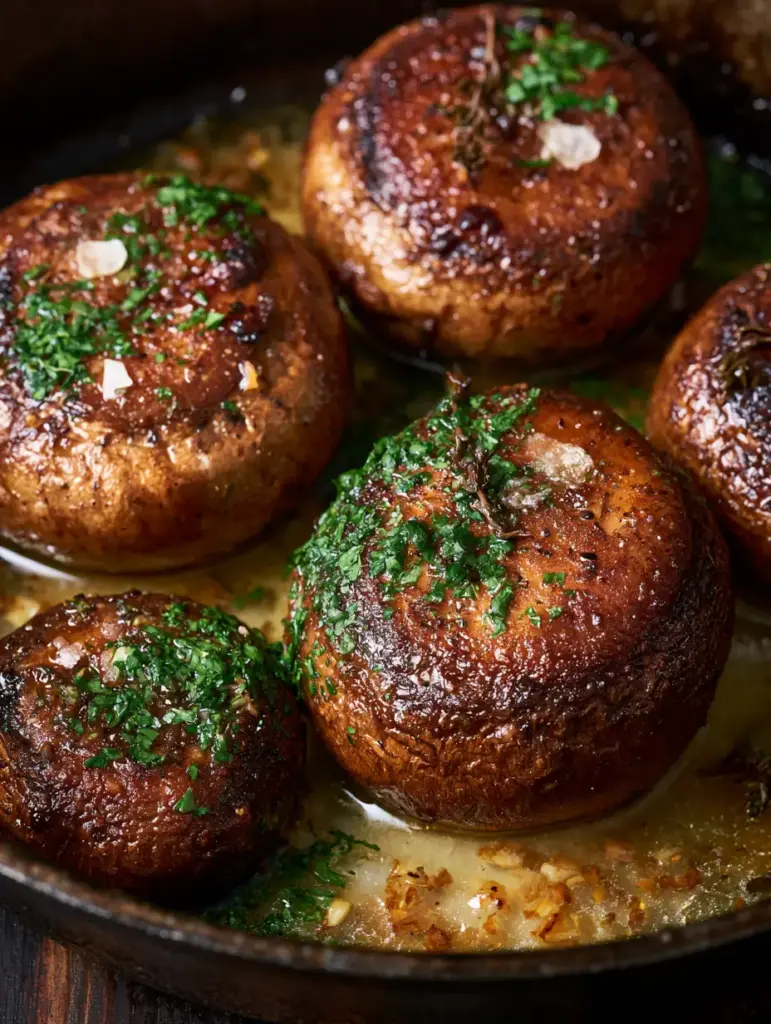
Reduce the heat to medium and add your 1 tbsp (15ml) of oil and 3 tbsp (42g) of unsalted butter. As the butter melts and begins to simmer, add the 4 minced garlic cloves and 4-5 fresh thyme sprigs. Use a spoon to baste the mushrooms with the foaming garlic butter, ensuring the tiny flecks of garlic begin to toast and stick to the seared caps.
5. The Final Garnish and Seasoning
Once the garlic is fragrant and golden, remove the skillet from the heat. Discard the spent thyme sprigs. Sprinkle a heavy dusting of finely chopped parsley over the top, followed by a generous scattering of Maldon sea salt flakes and freshly cracked pepper.
Culinary Secrets for Success
- The “No-Salt” Rule: Never salt your mushrooms at the beginning of the cooking process. Salt draws out moisture prematurely, which leads to a pool of liquid in your pan and prevents caramelization.
- Listen to the Pan: A quiet pan is a steaming pan. You want to hear a consistent, aggressive sizzle to ensure the heat is high enough to achieve that “craggy, seared surface.”
- Don’t Over-Stir: Patience is an ingredient. The more you move the mushrooms, the less time they have to build that crucial crust.
- Butter Timing: Add the butter only after the mushrooms are fully seared. Butter has a low smoke point and will burn if added at the start of the high-heat dry-sear phase.
What to Pair with Your Searing Mushrooms
These mushrooms are incredibly versatile and serve as a decadent addition to many other dishes. If you are looking for more mushroom recipes or complementary meals, consider serving these alongside a steak fajita bowl for an extra hit of umami.
They also make a fantastic topper for burger bowls or as a side for a sophisticated garlic butter baked salmon. If you’re focusing on a vegetarian feast, try pairing them with a crispy potato dish to create a texture-rich meal that satisfies every craving.
For those who love a broader variety of fungi-forward dishes, exploring easy mushroom recipes like a creamy mushroom julienne can help you round out your weekly menu with healthy dinner ideas.
Storage, Reheating, and Make-Ahead Advice
While these mushrooms are best served immediately to enjoy the crispy exterior, they can be stored in an airtight container in the refrigerator for up to 3 days. To reheat, avoid the microwave, as it will make the mushrooms rubbery.
Instead, return them to a hot cast iron skillet with a small pat of butter. Sauté over medium heat for 2-3 minutes until the exterior crisps back up and the garlic butter becomes fragrant again. We do not recommend freezing this specific recipe, as the cell structure of the mushroom changes significantly upon thawing, losing that signature firm bite.
Common Kitchen Queries
Yes, but cremini mushrooms (baby bellas) have less water content and a deeper flavor. White mushrooms will work but may require a slightly longer dry-sear to achieve the same mahogany color.
While you can use stainless steel, cast iron is preferred because it holds heat more effectively. When you add cold mushrooms to a pan, cast iron maintains its temperature, ensuring a better crust.
No. Mushrooms are porous and absorb water like a sponge. For the best sear, wipe them with a damp paper towel. If they are excessively dirty, a very quick rinse followed by immediate thorough drying is necessary.
Always salt at the end. Salting at the beginning draws out moisture, which prevents the Maillard reaction (browning) from occurring, resulting in a ‘wet’ sauté rather than a sear.
This usually happens if the pan is crowded or the heat is too low. When mushrooms are too close together, the steam they release gets trapped, causing them to boil in their own juices rather than sear.
The Perfect Dry-Seared Garlic Butter Mushrooms
This recipe brings the professional kitchen to your home, focusing on the techniques that matter: moisture control and heat management. By following this method, you ensure your mushroom recipes never result in a “wet” dish, but rather a meaty, decadent experience.
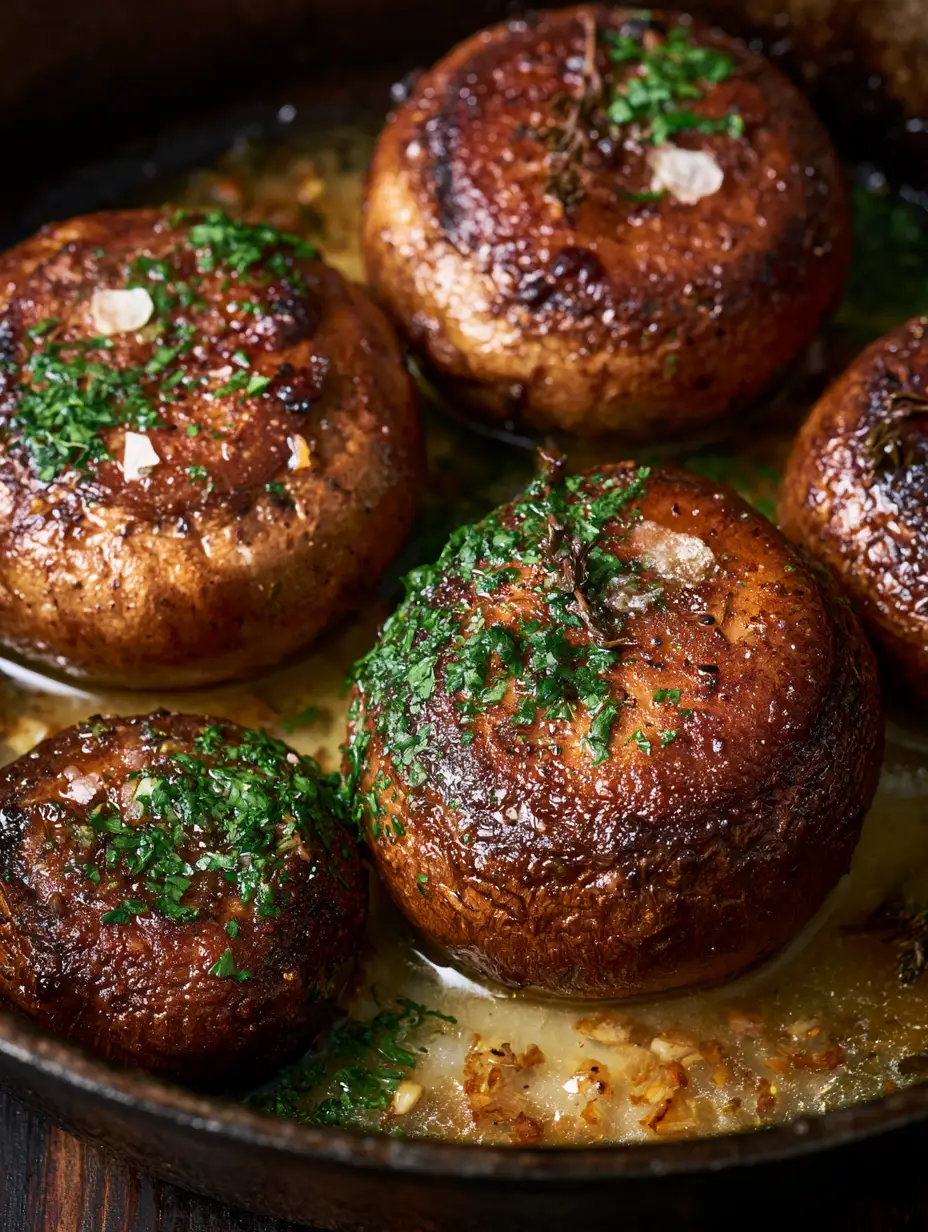
Mushroom Recipes: The Ultimate Garlic Butter Dry-Seared Cremini
Ingredients
Equipment
Method
- Wipe the cremini mushrooms with a damp paper towel to remove debris. Avoid washing under water to prevent sogginess.
- Place a cast iron skillet over medium-high heat until it is wispy-hot and ready for a dry sear.
- Add whole mushrooms to the dry pan in a single layer. Let sit undisturbed for 4-5 minutes until a deep golden-brown crust forms.
- Lower heat to medium. Add butter, oil, minced garlic, and thyme. Baste mushrooms with the simmering butter for 2-3 minutes.
- Remove from heat. Top with chopped parsley and Maldon sea salt flakes before serving.
Notes
Ensure the pan is not crowded to maintain a high temperature for the Maillard reaction.
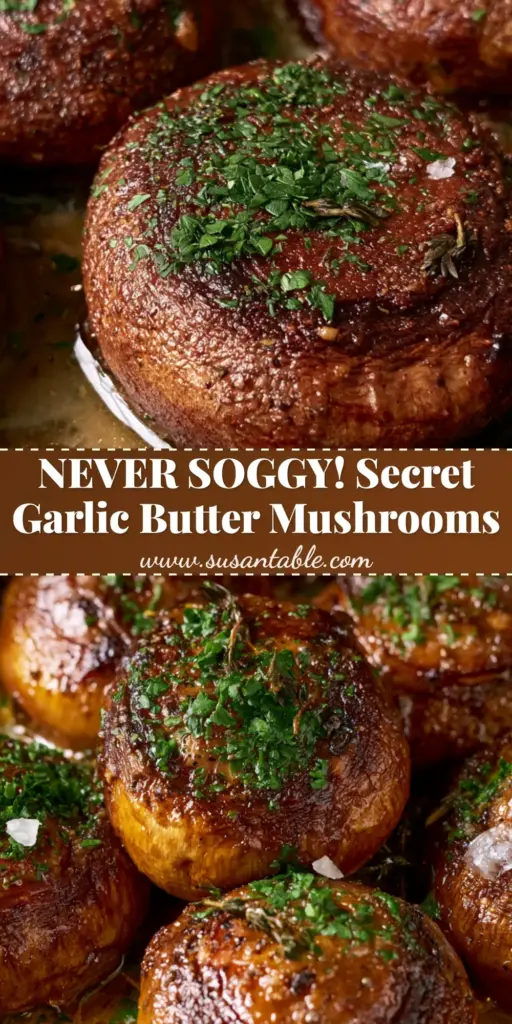
Elevate Your Home Cooking Today
Mastering the art of the dry-sear is a fundamental skill that will change how you approach vegetables forever. These Garlic Butter Cremini Mushrooms prove that with the right technique, simple ingredients can become extraordinary. We would love to hear how your sear turned out! Leave a comment below, sign up for our newsletter for more professional culinary guides, and be sure to share your creations on Pinterest to inspire other home cooks!