There is a specific culinary magic that happens when a humble head of green cabbage meets intense heat and high-quality fats. This garlic butter melting cabbage isn’t just a side dish; it is a masterclass in textural contrasts, featuring edges so charred they crunch like chips and centers so tender they dissolve on your tongue.
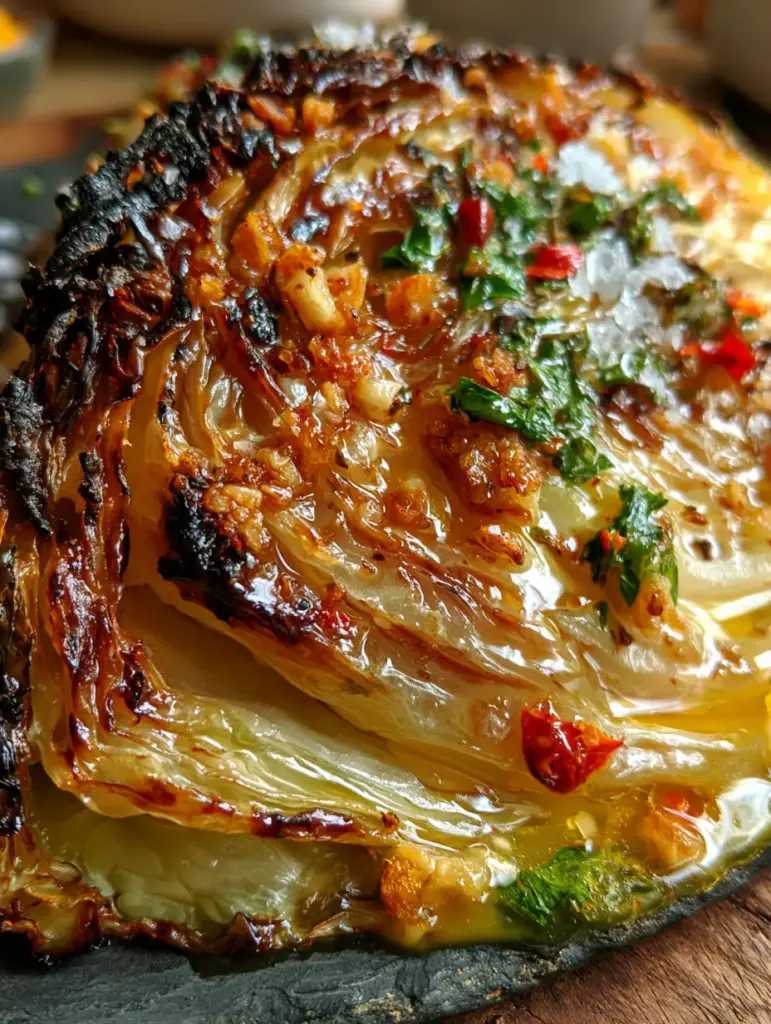
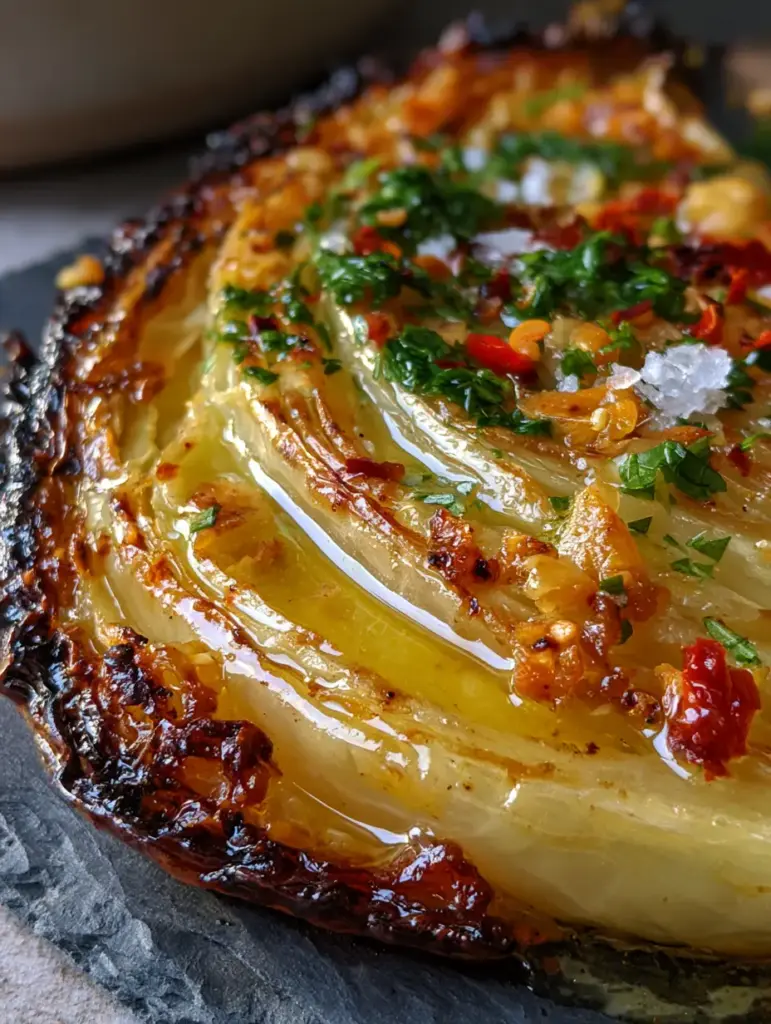
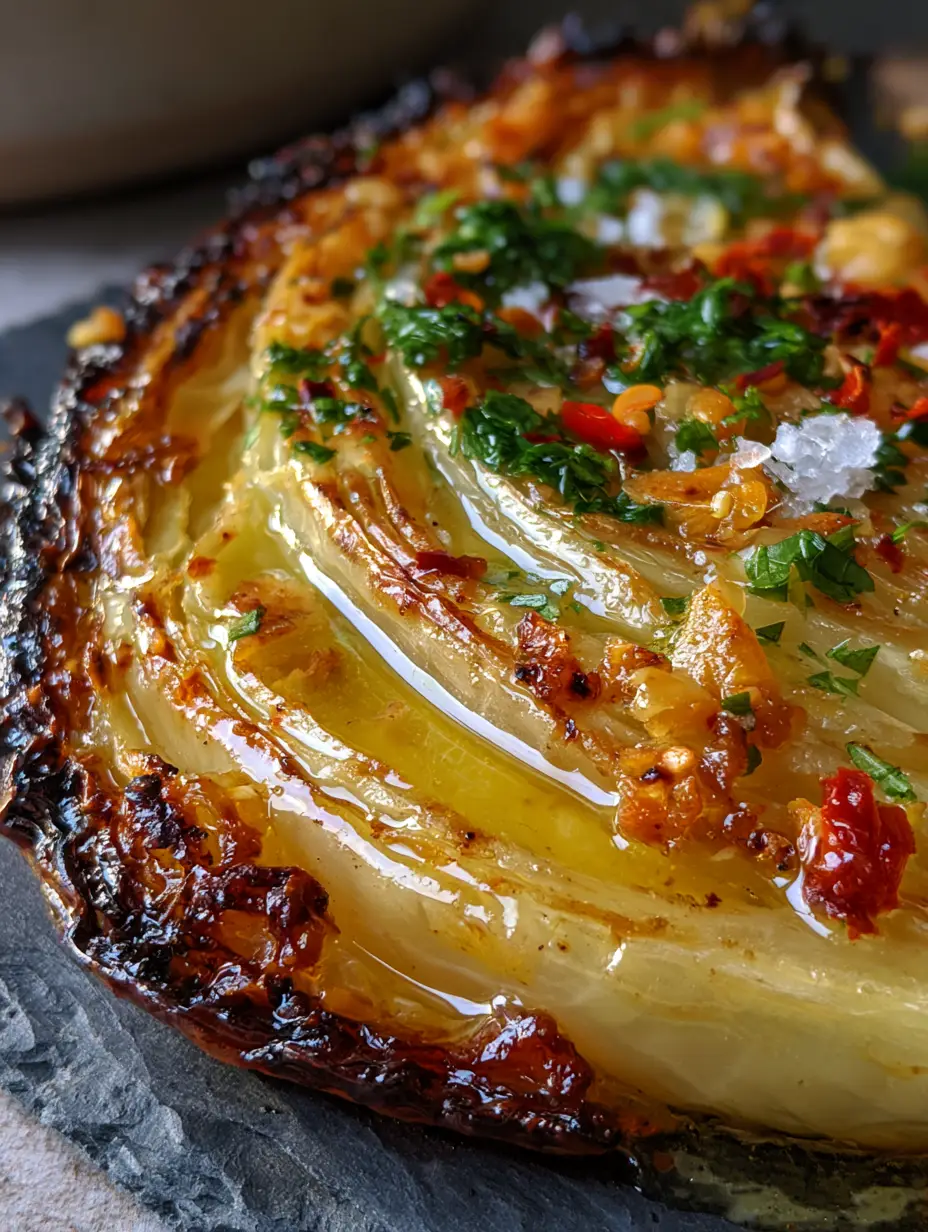
Imagine a thick wedge of cabbage, its outer leaves transformed into dark golden-brown lace, while the inner layers remain translucent and succulent. Each crevice is filled with a glossy, thick golden garlic butter sauce that pools enticingly on a rustic dark slate plate, catching the soft glow of morning sunlight.
Whether you are looking for a keto-friendly powerhouse or a show-stopping vegetable centerpiece, this garlic butter melting cabbage delivers a sensory experience that rivals any steakhouse side. Let’s dive into the forensic details of how to achieve this professional-grade result in your own kitchen.
Why You Will Crave This Roasted Cabbage Perfection
- The Ultimate Texture Play: You get the “shatter-crisp” experience of deeply charred outer leaves paired with the “melt-away” tenderness of the heart.
- Aromatics That Fill the House: The scent of golden fried minced garlic and bubbling butter creates an irresistible kitchen atmosphere.
- Visually Stunning Presentation: The contrast between the bright green parsley, vibrant red chili flakes, and the dark mahogany edges makes this a food photographer’s dream.
- Simple Ingredients, Complex Flavor: We use basic pantry staples to create a sophisticated flavor profile through the science of roasting.
The Essential Components for Melting Cabbage Success
To achieve the specific “Visual Recipe Blueprint” of this dish, every ingredient must serve a structural or flavor-driven purpose. We aren’t just tossing things in a pan; we are building layers of taste.
One Large Head of Green Cabbage (approx. 2 lbs / 900g): Green cabbage is non-negotiable here because its high water content allows the interior to steam into translucence while the tight leaves facilitate those iconic charred edges.
Unsalted High-Fat Butter (1/2 cup / 113g): Using unsalted butter allows us to control the seasoning precisely with flaky sea salt later. The fat provides the glossy, thick coating seen in the macro photography.
Fresh Garlic Cloves (6-8 large cloves, minced): We avoid jarred garlic at all costs. Freshly minced garlic, when fried in butter, provides those tiny golden “bits” that add a savory crunch to the finished wedge.
Extra Virgin Olive Oil (2 tbsp / 30ml): This is our “foundational invisible ingredient.” Oil has a higher smoke point than butter, allowing us to achieve the deep char in the oven without the fats burning and becoming bitter.
Fresh Italian Flat-Leaf Parsley (1/4 cup / 15g, finely chopped): The bright green color provides the essential visual pop against the golden butter and dark slate plate.
Red Pepper Flakes (1 tsp / 2g): These vibrant red flakes add a subtle heat that cuts through the richness of the butter sauce.
Flaky Sea Salt (1 tbsp / 10g): The coarse crystals provide a final textural element and “sparkle” under the light, just as described in the visual prompt.
Professional Tools for the Perfect Sear
Achieving the forensic accuracy of our blueprint requires the right heat conductivity. You will need a heavy-duty large rimmed baking sheet—preferably aluminum or carbon steel—to ensure even heat distribution.
A sharp chef’s knife is also vital for cutting the cabbage into uniform wedges without shredding the delicate leaves. Finally, a small light-colored saucepan is recommended for the garlic butter, so you can visually monitor the garlic as it turns from raw to a perfect golden brown.
The Step-by-Step Evolution of Melting Cabbage
Phase 1: Precision Prepping and Slicing
Start by preheating your oven to 425°F (220°C). This high temperature is critical for creating the charred edges before the center becomes overly mushy.
Remove any damaged or exceptionally tough outer leaves from the cabbage. Cut the head in half through the core, then cut each half into four thick wedges, ensuring the core remains attached to each piece to hold the layers together.
Phase 2: The Foundational Sear
Place your wedges on the baking sheet and brush all exposed sides generously with the olive oil. Season lightly with a pinch of salt to draw out just enough moisture for the leaves to become translucent.
Arrange the wedges so one flat side is flush against the pan. Roast for 15-20 minutes, then flip carefully. You are looking for a deep, dark golden-brown color on the surface touching the pan.
Phase 3: Crafting the Glossy Garlic Butter Sauce
While the cabbage finishes roasting, melt the butter in your saucepan over medium-low heat. Add the minced garlic and cook, stirring constantly.
Watch for the “Sensory Cue”: The butter will begin to foam, and the garlic will transition from white to a pale straw color. Immediately remove from heat when the garlic looks like tiny golden fried nuggets.
Phase 4: The Final Infusion
Once the cabbage is tender and charred, remove it from the oven. While still sizzling, pour the warm garlic butter sauce directly over the wedges.
The butter should pool between the translucent leaves, creating that high-gloss highlight seen in our “Visual Recipe Blueprint.” The heat of the cabbage will further emulsify the butter into a thick, clinging sauce.
Expert Tips for Culinary Forensics
- Don’t Crowd the Pan: If the wedges are too close, they will steam rather than roast. Space them out to ensure the air can circulate and create those crispy, dark edges.
- The Core is Your Friend: Do not trim the core completely away. It acts as the “anchor” for the wedge, allowing you to flip them without the dish turning into a pile of loose leaves.
- The Garlic Timing: If you add the garlic to the oven with the cabbage, it will burn and turn acrid. Always fry the garlic in butter separately and add it at the end for that perfect golden texture.
- Morning Light Aesthetics: To replicate the “high-gloss highlights” of the prompt, serve this dish immediately while the butter is at its most liquid and reflective state.
Optimal Storage and Reheating Methods
Garlic butter melting cabbage is best enjoyed fresh, but if you have leftovers, store them in an airtight glass container for up to 3 days. The butter will solidify in the fridge, creating a concentrated flavor paste around the cabbage.
To reheat, avoid the microwave as it will make the cabbage rubbery. Instead, place the wedges in a skillet over medium heat with a splash of water and cover for 2 minutes to re-steam the center, then uncover to let the edges crisp up again in the residual garlic butter.
What to Serve With This Buttery Masterpiece
This dish is incredibly versatile and acts as a fantastic companion to protein-heavy mains. It pairs exceptionally well with the savory crust of a hibachi steak or the bright, citrusy notes of huli-huli-chicken.
If you are looking for a vegetarian feast, serve it alongside garlic butter noodles for a double dose of allium goodness. For those who enjoy a bit of heat and crunch, these wedges are a great side for jalapeno popper egg rolls.
For a lighter lunch, try pairing a single wedge with a crisp spinach mandarin salad to balance the richness of the butter sauce.
Frequently Asked Questions
While you can, red cabbage is denser and takes longer to soften. Green cabbage is preferred for its ability to become translucent and ‘melt’ while the edges char beautifully.
You should remove and discard the tough outer leaves. Since the inner leaves are tightly packed and protected, you generally don’t need to wash the inside of the head, which helps keep it dry for better roasting.
The secret is to fry the minced garlic in the butter separately on the stovetop. Adding garlic to the cabbage during the high-heat roasting process will almost always result in bitter, burnt bits.
Yes! This recipe is naturally low-carb and high in healthy fats, making it an excellent choice for ketogenic and low-carb lifestyles.
Sogginess usually occurs if the oven temperature is too low or the pan is overcrowded. Ensure your oven is at 425°F (220°C) and give the wedges space to roast rather than steam.
The Master Recipe for Garlic Butter Melting Cabbage
Garlic Butter Melting Cabbage: The Ultimate Roasted Wedge Recipe
Ingredients
Equipment
Method
- Preheat your oven to 425°F (220°C). Cut the green cabbage into 8 uniform wedges, keeping the core intact for structural integrity.
- Place wedges on a baking sheet. Brush with 2 tbsp (30ml) olive oil and sprinkle lightly with salt. Ensure the flat sides are in direct contact with the pan.
- Roast for 15-20 minutes until the bottom is deeply charred and dark golden brown. Flip and roast for another 10-15 minutes until the inner leaves are translucent and tender.
- In a small saucepan, melt 1/2 cup (113g) butter. Add minced garlic and cook over medium-low heat until the garlic bits are golden and fragrant. Do not burn.
- Pour the hot garlic butter sauce over the roasted wedges. Top with fresh parsley, red pepper flakes, and a heavy sprinkle of flaky sea salt. Serve immediately on a dark slate plate.
Notes
Use high-quality grass-fed butter for the most glossy and flavorful sauce.
Closing Thoughts on This Roasted Cabbage Revelation
Transforming a simple vegetable into a gourmet experience is all about attention to detail. By following this forensic approach to roasting and butter-infusing, you’ve created a dish that is as beautiful as it is delicious. The combination of charred edges, translucent centers, and fried garlic bits is a testament to the power of heat and fat.
If you enjoyed this recipe, please leave a comment below and let us know how your char turned out! Don’t forget to share your beautiful recreations on Pinterest and tag us. Happy roasting!