When you are hunting for the perfect homemade snack recipes, you are likely looking for that elusive intersection of convenience, nutrition, and pure, unadulterated flavor. These no-bake peanut butter energy bites are the answer to every mid-afternoon slump and post-workout craving. They are dense, chewy, and packed with the hearty texture of thick-cut rolled oats, satisfying the soul while providing a steady stream of energy.
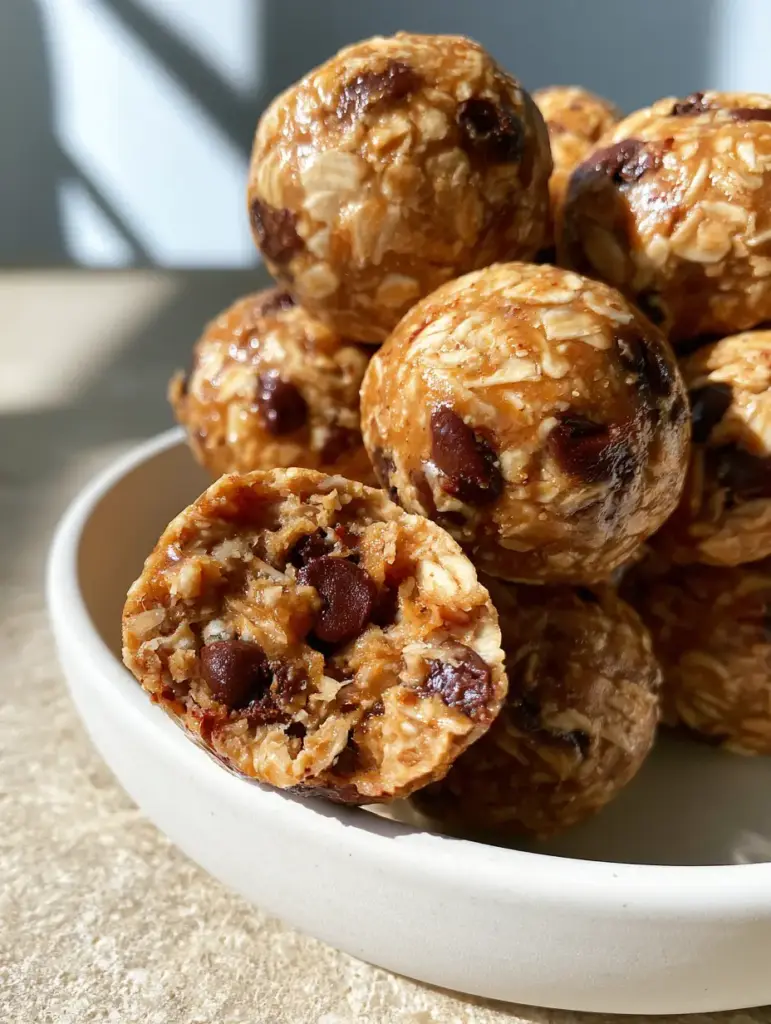
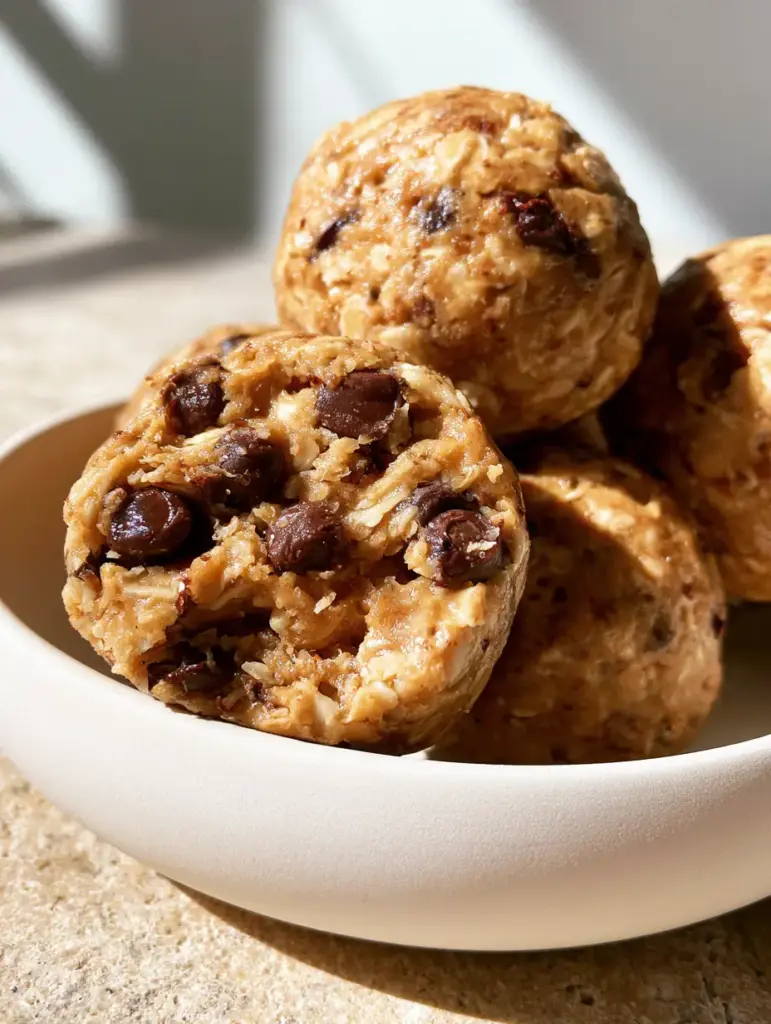
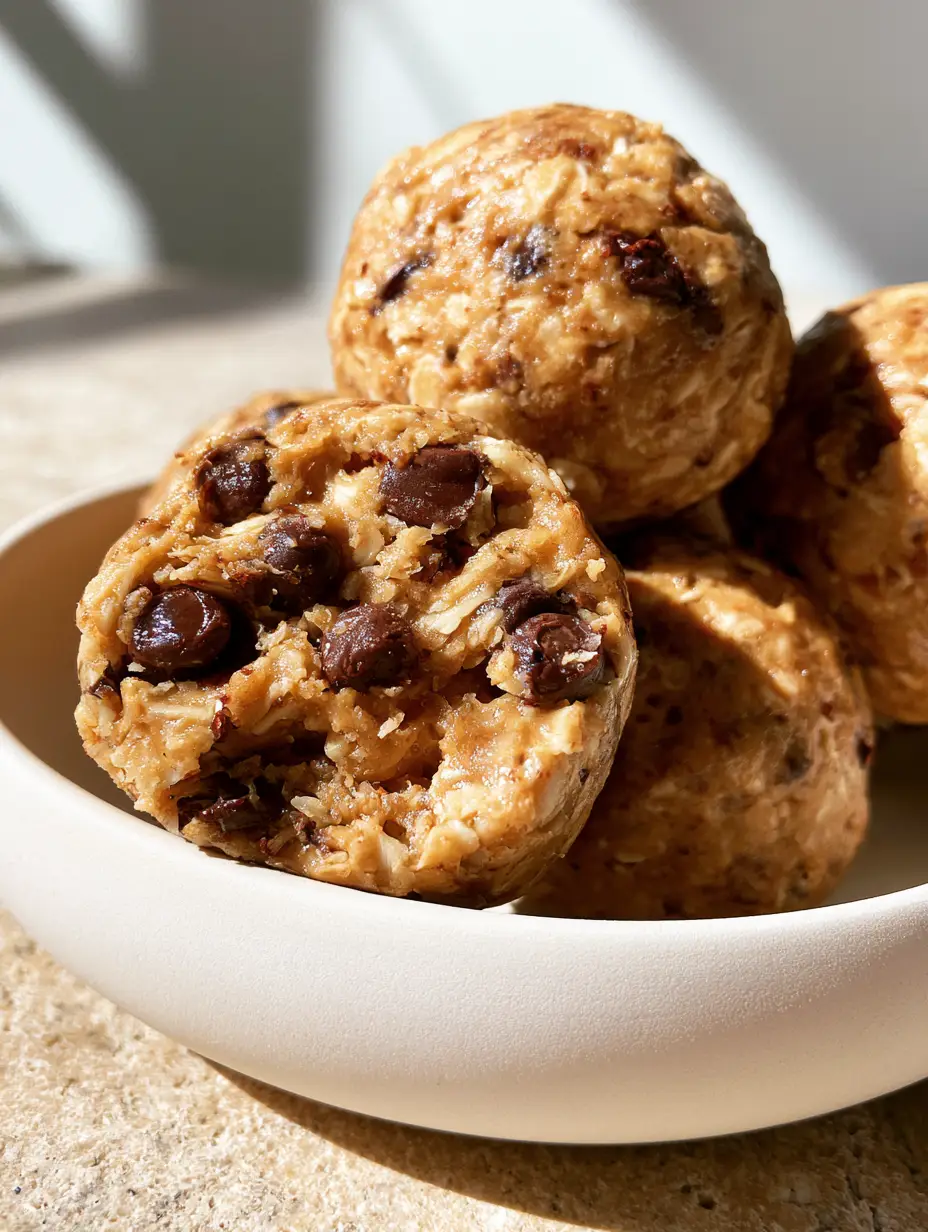
Imagine biting into a snack that feels like a decadent truffle but performs like a superfood. The macro view of these bites reveals a complex landscape of golden, creamy nut butter binding together every individual grain of oat. The miniature dark chocolate chips provide a rhythmic crunch, while a final, glossy drizzle of honey catches the light, promising a sweetness that is balanced by a sophisticated hit of sea salt flakes.
Whether you are a busy parent looking for kid-friendly treats or an athlete needing a portable fuel source, these energy bites represent the gold standard of modern snacking. They require zero time in the oven, meaning you can go from a bare pantry to a gourmet snack in under fifteen minutes. Let’s dive into the culinary science that makes this simple combination so incredibly addictive.
Why These No-Bake Energy Bites Are the Gold Standard of Snack Prep
- Textural Mastery: The use of thick rolled oats ensures a substantial “bite” that doesn’t turn to mush, even after days in the refrigerator.
- Balanced Sweetness: Dark chocolate and honey provide a sophisticated sweet profile that avoids the cloying sugar-heavy taste of store-bought granola bars.
- Glossy Visual Appeal: The finishing honey drizzle and sea salt flakes transform a humble snack into a photogenic, cafe-quality treat.
- Sustained Satiety: The combination of healthy fats from the peanut butter and complex carbohydrates from the oats keeps you full for hours.
When we look at healthy snack recipes, we often see a sacrifice in texture or taste. However, these bites rely on the natural oils of premium nut butter to create a luxurious mouthfeel that rivals traditional desserts.
The Essential Anatomy of a Chewy Energy Bite
To achieve the specific, dense interior seen in our visual blueprint, we must be intentional with our ingredient selection. Every component plays a structural role in the final sphere, ensuring it holds its shape while remaining soft enough to yield to a single bite.
The Structural Foundation: Thick Rolled Oats
You will need 2 cups (180g) of thick-cut rolled oats. Unlike quick oats, which are pre-steamed and rolled thin, thick-cut oats provide a robust, chewy architecture. These oats act as the “bones” of your snack, absorbing just enough moisture from the honey and peanut butter to soften without losing their individual identity.
The Binding Agent: Creamy Natural Peanut Butter
Measure out 1 cup (250g) of creamy natural peanut butter. Look for the variety where the only ingredients are peanuts and salt; the natural oils in this type of butter are essential for an emulsion that coats every oat. This creamy gold base provides the structural “glue” and a rich, savory depth that balances the chocolate.
The Flavor Accents: Dark Chocolate and Honey
Incorporate 1/2 cup (90g) of miniature dark chocolate chips. The “mini” aspect is crucial here; larger chips can cause the bites to crumble apart, whereas mini chips distribute evenly, ensuring every bite has a hit of cocoa. For the sweetener, use 1/3 cup (80ml) of glossy honey. The honey serves two purposes: it provides a floral sweetness and acts as a secondary binder that creates that characteristic glistening surface.
The Finishing Touches: Salt and Vanilla
Even the simplest homemade snack recipes need “invisible” flavor enhancers. A 1/2 tsp of sea salt flakes sprinkled on top cuts through the richness of the fats. Additionally, 1 tsp (5ml) of pure vanilla extract added to the batter provides an aromatic bridge between the nut butter and the dark chocolate, elevating the entire flavor profile from simple to artisanal.
Critical Equipment for Artisanal Snack Making
While this is a no-bake recipe, the right tools ensure consistency in size and texture. To replicate the professional stack seen in our photography, you will need a few basic kitchen essentials.
A large glass mixing bowl is preferred for combining the ingredients, as it allows you to see if any dry oats are hiding at the bottom. A sturdy silicone spatula is the best tool for folding, as the mixture will become quite thick and tacky as the oats begin to hydrate.
For uniform shaping, a small spring-loaded cookie scoop (about 1 tablespoon capacity) is a game-changer. This ensures each bite is exactly the same size, which is not just about aesthetics—it ensures consistent texture and calorie counting. Finally, a piece of parchment paper or a silicone baking mat will prevent the bites from sticking to your tray during the initial setting phase.
Step-by-Step Instructions for Perfect Energy Bites
Creating these bites is a lesson in patience and tactile sensation. Follow these steps to ensure your snacks have that perfect, dense, chewy interior and glistening honey-drizzled exterior.
Phase 1: The Master Mix
In your large mixing bowl, combine the 1 cup (250g) of creamy peanut butter, 1/3 cup (80ml) of honey, and 1 tsp of vanilla extract. Use your spatula to whisk these together until they form a smooth, homogenous, and glossy liquid. This is the foundation of your snack; if the oils aren’t fully integrated here, the bites will be greasy.
Phase 2: Hydrating the Oats
Add the 2 cups (180g) of thick rolled oats and 1/2 tsp of sea salt (if not using flakes for the top). Fold the oats into the peanut butter mixture gently but thoroughly. Look for a visual cue: every single oat should be darkened and glistening from the coating. If you see dry white spots on the oats, keep folding.
Phase 3: The Chocolate Fold
Once the oat mixture is cool (if your peanut butter was warm), fold in the 1/2 cup (90g) of miniature dark chocolate chips. We wait until the end to add these so they don’t melt, maintaining their distinct shape and “crunch” against the chewy oats. The contrast between the dark morsels and the golden oats is what makes these bites so visually striking.
Phase 4: The Chill and Roll
Place the entire bowl in the refrigerator for at least 30 minutes. This is a non-negotiable step in quality crunchy snack recipe development. Chilling allows the oats to hydrate and the fats in the peanut butter to firm up, making the rolling process much cleaner. After chilling, scoop 1-tablespoon portions and roll them between your palms into smooth spheres. You should feel a slight tackiness, but the balls should hold their shape firmly.
Phase 5: The Final Flourish
Arrange the bites on a matte white ceramic dish. Take a small spoon and drizzle a tiny amount of extra honey over the top of the stack in a zig-zag motion. Immediately sprinkle a few sea salt flakes onto the wet honey. The salt will adhere to the honey, creating that professional “macro” look with crystalline textures against the glossy drizzle.
Expert Tips for Success with Homemade Snack Recipes
- Temperature Control: If your natural peanut butter is too stiff (common if it’s been in the fridge), microwave it for 15 seconds before mixing. It should be the consistency of heavy cream.
- Oat Selection: Never substitute instant oats. Instant oats will absorb the moisture too quickly and turn into a paste, losing the “dense, chewy interior” we are aiming for.
- Wet Hands: If the mixture is sticking to your hands while rolling, lightly dampen your palms with water. This creates a barrier that allows the sphere to slide and smooth out perfectly.
- Customization: If you find the mixture too dry, add honey one teaspoon at a time. If it’s too wet, add more oats. The “feel” of the dough should be similar to stiff play-dough.
For those who love a variety of textures, you might consider pairing these with avocado toast aesthetic for a complete brunch spread or following them up with a creamy pasta dinner for a balanced day of eating.
Storage, Reheating & Freezing
Because these are no-bake and rely on fresh fats, storage is key to maintaining that glistening honey surface. Place the bites in an airtight container, separating layers with parchment paper to prevent them from fusing together.
In the Refrigerator: These will stay fresh and chewy for up to 2 weeks. The cold temperature actually improves the texture, making them denser and more fudge-like over time.
In the Freezer: These are excellent for long-term meal prep. Freeze them on a tray first, then transfer to a freezer bag. They will last for 3 months. You can eat them straight from the freezer for a “frozen truffle” experience or let them thaw at room temperature for 10 minutes.
What to Serve With These Energy Bites
While these are a standalone powerhouse snack, they fit beautifully into a larger culinary day. If you are hosting a healthy brunch, serve them alongside a crisp spinach mandarin salad to provide a sweet counterpoint to the citrus and greens.
If you’re craving something more substantial for dinner after your snack, these bites lead perfectly into a savory meal like sweet honey chicken, which echoes the honey notes in the bites. They are the perfect “bridge” food—nutritious enough for breakfast, but sweet enough to serve as a light dessert after a heavy meal.
Frequently Asked Questions
They can be! Ensure you use certified gluten-free thick rolled oats. The other main ingredients—peanut butter, honey, and chocolate chips—are naturally gluten-free.
It is not recommended. Quick oats are much thinner and will absorb the moisture too quickly, resulting in a mushy texture rather than the dense, chewy bite seen in the photos.
Chill the mixture for at least 30 minutes before rolling. If they are still tacky, lightly dampen your palms with water or a tiny bit of coconut oil to create a smooth finish.
Stored in an airtight container in the refrigerator, these bites stay fresh and maintain their texture for up to 2 weeks. They can also be frozen for up to 3 months.
Sunflower seed butter (SunButter) is an excellent 1:1 replacement that maintains the necessary creamy consistency and fat content for binding the oats.
The Perfect Three-Ingredient Base Energy Bites
Homemade Snack Recipes: The Ultimate No-Bake Peanut Butter Oat Bites
Ingredients
Equipment
Method
- In a large bowl, stir together the creamy peanut butter, honey, and vanilla extract until smooth and glossy.
- Add the thick rolled oats and sea salt. Fold thoroughly with a spatula until every oat is evenly coated and glistening.
- Gently fold in the miniature dark chocolate chips until distributed throughout the sticky dough.
- Place the bowl in the refrigerator for 30 minutes to allow the oats to hydrate and the mixture to firm up.
- Using a 1-tablespoon scoop, portion the dough and roll between your palms into smooth, tight spheres.
- Stack the bites on a plate, drizzle with additional honey, and sprinkle with sea salt flakes for a professional finish.
Notes
If the mixture is too sticky to roll, lightly wet your hands with cold water between every few bites.
Closing & Call to Action
Mastering homemade snack recipes like these no-bake peanut butter bites is a total game-changer for your weekly routine. They offer a level of quality and flavor control that you simply cannot find in a plastic wrapper. The dense, chewy oats and the snap of miniature chocolate chips create a sensory experience that proves “healthy” can also mean “delicious.”
If you enjoyed this recipe, please leave a comment below and let me know how your bites turned out! Don’t forget to follow me on Pinterest for more culinary inspiration and share your glistening snack photos with the community. Happy rolling!