Looking for the ultimate handheld dessert? These banana pudding cheesecake cones combine the nostalgic flavor of southern banana pudding with the rich, velvety texture of a no-bake cheesecake. Perfect for summer parties or outdoor gatherings, this recipe is a visual masterpiece that will stop the scroll on any social feed. Whether you are a fan of classic desserts or looking for a modern twist, these banana pudding cheesecake cones deliver a thick, creamy filling tucked into a perfectly crunchy, toasted waffle cone.
Why You Will Crave These Handheld Banana Delights
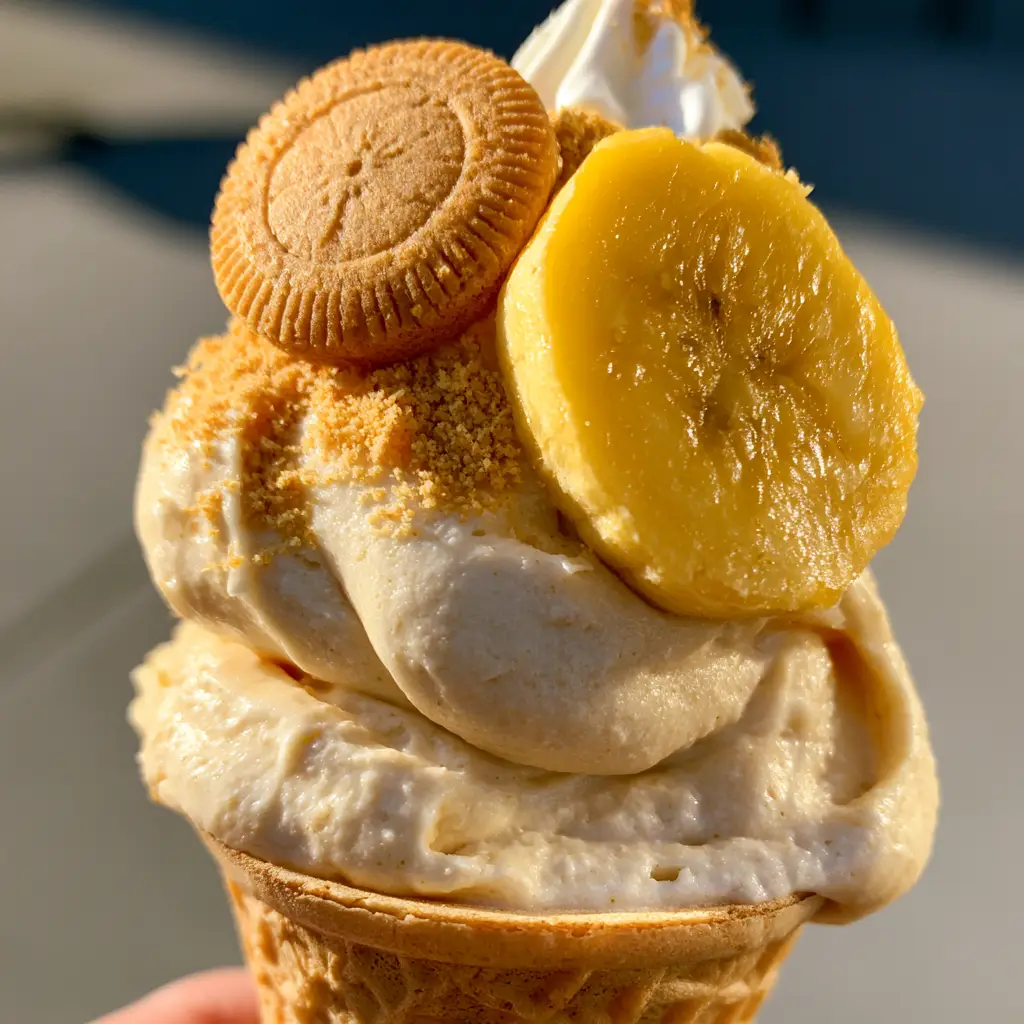
- Unmatched Texture: A crispy, golden-brown waffle cone filled with a dense, matte-finish banana mousse.
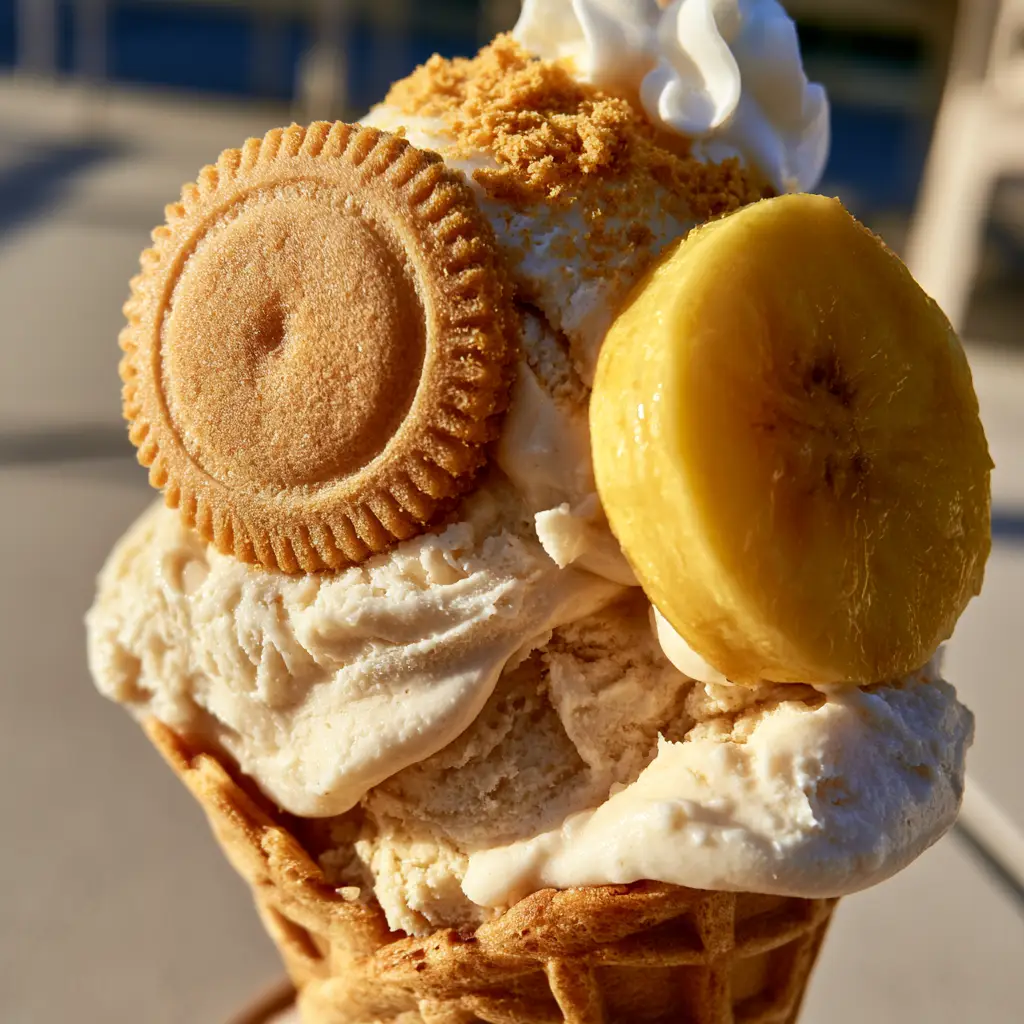
- Visual Perfection: Topped with a perfectly circular whole Nilla wafer and a thick, fresh slice of bright yellow banana.
- Portability: The ideal grab-and-go dessert for busy families or patio parties during golden hour.
- No-Bake Ease: A sophisticated dessert profile without ever having to turn on the oven for the filling.
If you love creamy, decadent treats, you might also enjoy our easy peanut butter balls or these rich apple snickerdoodle bars.
The Essential Ingredients for Velvet Filling and Crispy Cones
To achieve the specific “Visual Recipe Blueprint” look, every ingredient serves a dual purpose of flavor and structural integrity.
For the Thick Banana Cheesecake Filling
- Cream Cheese (Room Temperature): 16 oz (450g). This provides the “stiff” matte texture visible at the peak of the cone.
- Instant Banana Cream Pudding Mix: 3.4 oz (96g). This acts as a stabilizer and provides that unmistakable nostalgic flavor.
- Cold Whole Milk: 1 cup (240ml). Essential for hydrating the pudding mix without thinning the mousse too much.
- Heavy Whipping Cream: 1.5 cups (355ml). Beaten to stiff peaks to create the “velvety banana cheesecake mousse” texture.
- Powdered Sugar: 1/2 cup (60g). Adds sweetness and helps stabilize the whipped cream dollop.
For the Toasted Waffle Cone Assembly
- Large Waffle Cones: 6-8 cones. Look for golden-brown cones for the best visual contrast.
- Fresh Bananas: 2 large. You will need thick, perfectly circular slices for the topping.
- Vanilla Wafer Cookies: 1 box. Use whole cookies for the garnish and crushed crumbs for the “fine golden dust.”
- Ground Cinnamon: A light dusting for the final sensory touch.
- Melted Butter: 2 tbsp (30ml). Used to lightly brush the cones before toasting to enhance the golden-brown crispiness.
For more comforting dessert ideas, check out our cinnamon roll casserole which pairs beautifully with a morning coffee.
Step-by-Step Guide to the Perfect Banana Pudding Cheesecake Cones
Step 1: Preparing the Toasted Waffle Cones
To ensure your banana pudding cheesecake cones stay crunchy, we must prep the vessel. Lightly brush the exterior of your waffle cones with a tiny amount of melted butter.
Place them in a 350°F (175°C) oven for just 3-5 minutes. You are looking for a golden-brown crispy finish and a warm, toasted aroma. Let them cool completely before filling to prevent the mousse from melting.
Step 2: Whipping the Velvety Banana Mousse
In a large mixing bowl, beat the softened cream cheese until it is completely smooth with no lumps. This is the secret to the thick banana cheesecake filling.
Slowly whisk in the cold milk and the instant banana pudding mix. The mixture will become very thick quickly. In a separate bowl, beat the heavy whipping cream and powdered sugar until stiff, matte peaks form.
Gently fold the whipped cream into the banana mixture. You want to maintain the airiness while ensuring a dense and matte texture that can stand tall in a handheld cone.
Step 3: Engineering the Handheld Layers
Place a whole vanilla wafer cookie at the very bottom of each toasted cone to act as a “plug” for the filling. Spoon or pipe the thick, velvety banana cheesecake mousse into the cone, allowing it to overflow slightly at the top.
Use a piping bag with a large open star tip for the most professional, high-resolution appearance. The filling should look overflowing and mouth-watering.
Step 4: The Visual Garnish and Finishing Touches
Now, follow the visual blueprint exactly. Place one perfectly circular whole Nilla wafer on one side of the mousse peak. Press a thick, fresh slice of bright yellow banana right next to it.
Add a tiny dollop of stiff whipped cream at the very peak. Sprinkle a dusting of fine golden Nilla wafer crumbs over the top, and finish with a light dusting of cinnamon to add warmth and visual depth.
Expert Tips for Success
- Temperature Control: Ensure your cream cheese is truly room temperature (around 70°F/21°C) to avoid tiny white lumps in your yellow mousse.
- Avoid Sogginess: Only fill the cones within 1-2 hours of serving. The moisture in the banana pudding cheesecake cones filling will eventually soften the cone.
- Banana Browning: Toss your banana slices in a little lemon juice or pineapple juice to keep them bright yellow for hours.
- Piping Technique: Hold the cone at a slight angle while piping to ensure the mousse fills all the way to the bottom tip.
Storage and Make-Ahead Instructions
While the assembled banana pudding cheesecake cones are best eaten fresh, you can prepare the components ahead of time. Store the thick banana cheesecake filling in an airtight container in the refrigerator for up to 3 days.
Store the toasted cones in a dry, room-temperature pantry. Do not refrigerate empty cones as they will lose their crunch. We do not recommend freezing the fully assembled cones, as the fresh banana and waffle texture will degrade upon thawing.
What to Serve With This Dessert
These cones are a star on their own, but they pair excellently with other party favorites. If you’re hosting a full meal, start with a hearty bowl of homemade potato soup or our popular easy taco soup.
For a brunch-themed gathering, these cones are the perfect sweet finish after a serving of salted caramel butter bars.
Frequently Asked Questions
Absolutely. While banana cream is traditional, vanilla or white chocolate pudding mixes also work well. If you use vanilla, consider adding a teaspoon of banana extract to maintain the signature flavor profile.
Yes! Homemade whipped cream is preferred for this recipe to achieve the ‘stiff, matte’ texture described. Be sure to beat it to stiff peaks so the filling remains stable enough to hold its shape in the cone.
To maintain the crunch, toast the cones briefly in the oven and fill them no more than 1-2 hours before serving. For extra protection, you can coat the inside of the cone with melted white chocolate to create a moisture barrier.
Gently toss your fresh banana slices in a little bit of lemon juice or pineapple juice. The acidity prevents oxidation, keeping the fruit looking bright yellow and fresh for your photos and guests.
You can make the cheesecake filling and toast the cones up to 2 days in advance. Store the filling in the fridge and the cones in a dry pantry. Assemble the cones just before you plan to serve them for the best texture.
The Ultimate Banana Pudding Cheesecake Cones Recipe
Banana Pudding Cheesecake Cones with Toasted Waffle Cones
Ingredients
Equipment
Method
- Preheat oven to 350°F (175°C). Brush the outside of waffle cones with melted butter. Bake for 3-5 minutes until extra crispy and golden-brown. Cool completely.
- Beat softened cream cheese until smooth. Whisk in cold milk and instant banana pudding mix until thick and combined.
- In a separate bowl, beat heavy cream and powdered sugar until stiff, matte peaks form. Fold 3/4 of the whipped cream into the banana mixture.
- Place a whole wafer at the bottom of each cone. Pipe the thick banana cheesecake mousse into the cones, creating an overflowing peak.
- Top each peak with a whole Nilla wafer, a fresh banana slice, a dollop of the remaining whipped cream, crushed wafer crumbs, and a light dusting of cinnamon.
Notes
Use extra-ripe bananas only for flavor, but use firm-ripe bananas for the topping slices to ensure they look perfect.
Save, Share, and Rate!
Did these banana pudding cheesecake cones become your new favorite handheld treat? We want to see your results! Save this recipe to your Dessert Board on Pinterest so you never lose it.
If you made these for a party, please leave a 5-star rating in the recipe card above and upload a photo in the comments below. Follow KellyTaste for more mouth-watering, Pinterest-perfect recipes every week!