The Hot cocoa charcuterie board is the undisputed queen of holiday entertaining, turning a simple beverage into a breathtaking interactive experience. Imagine a dark rustic wooden platter overflowing with textures: fluffy white marshmallows, crisp hazelnut wafers, and the sharp peppermint scent of candy canes. This isn’t just a snack tray; it is a curated sensory journey designed to keep your guests lingering around the table for “just one more” dip.
Creating a visually stunning board requires more than just tossing ingredients onto a plate; it requires a balance of heights, colors, and flavors. We focus on the contrast between the rich dark hot chocolate and the golden-brown toasted marshmallows that crown each mug. Whether you are hosting a cozy movie night or a sophisticated holiday gala, this dessert spread provides the perfect “handheld smartphone photo” moment that every host dreams of capturing.
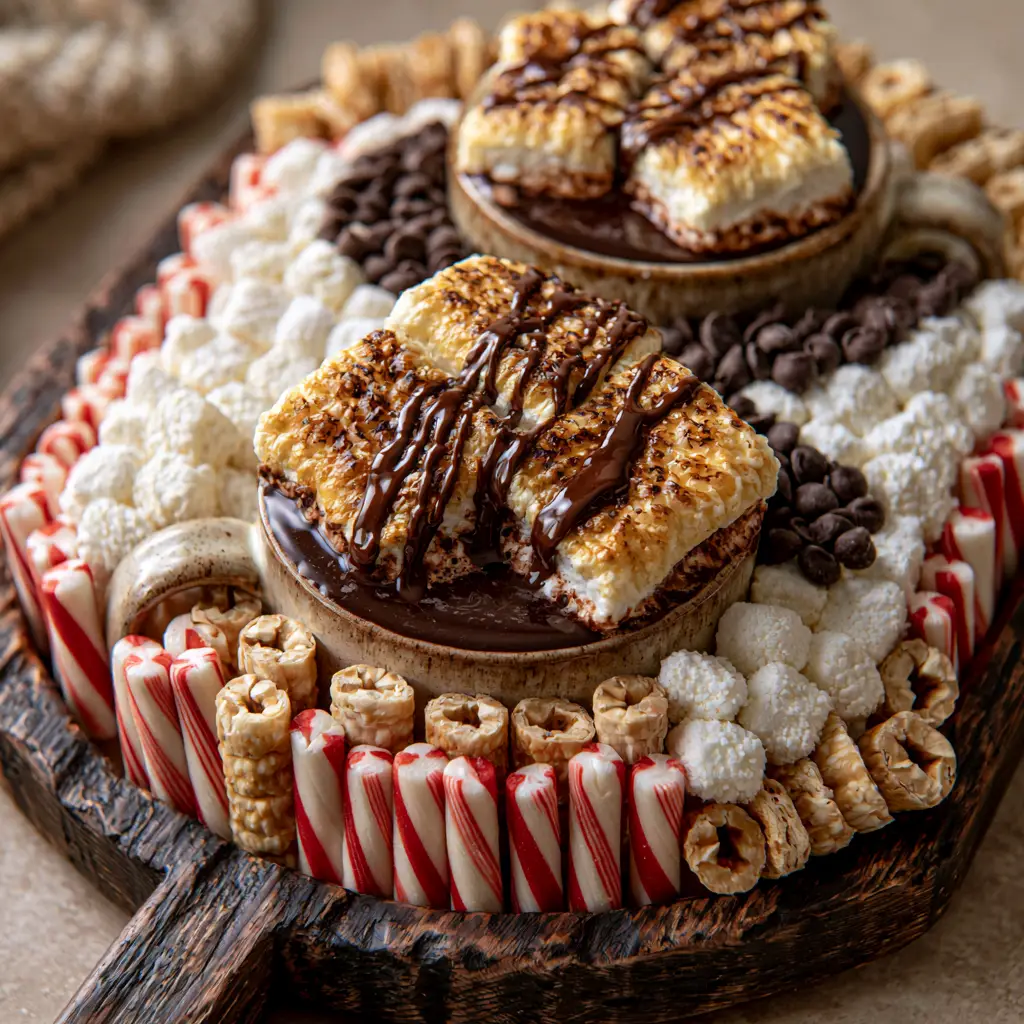
Why This Festive Spread Is the Ultimate Holiday Showstopper
- Textural Contrast: From the snap of the semi-sweet chocolate chips to the airy crunch of rolled hazelnut wafers, every bite offers a different mouthfeel.
- Visually Anchored: The center features two ceramic mugs filled with rich dark hot chocolate, creating a focal point that draws the eye immediately to the warmth of the dish.
- Customizable Comfort: Guests can customize their experience with red-and-white striped peppermint sticks or a heavy hand of glossy chocolate drizzle.
- Pro-Level Aesthetics: Using a dark rustic wooden platter provides a moody, cozy backdrop that makes the fluffy white marshmallows and vibrant peppermint colors pop.
The Anatomy of a Perfect Cocoa Board: Essential Ingredients
To achieve the visual and culinary depth required for an elite Hot cocoa charcuterie board, you need high-quality fats and sugars that hold their shape at room temperature. We prioritize ingredients that look as good as they taste, ensuring the “glossy” and “toasted” descriptors from our blueprint are realized.
Dutch-Processed Cocoa Powder: 1/2 cup (45g). This provides that “rich dark” color and a smooth, non-acidic chocolate base that pairs perfectly with sweet toppings.
Whole Milk and Heavy Cream: 3 cups (720ml) milk and 1 cup (240ml) cream. The high fat content is the “invisible” secret to a luxurious mouthfeel that doesn’t turn watery on the board.
Semi-Sweet Chocolate Chips: 1 cup (175g). These serve a dual purpose: they melt into the cocoa for thickness and act as a scattered garnish for textural variety.
Large Marshmallows: 1 bag (approx. 283g). We use these for the “thick toasted golden-brown” toppers that define the center mugs.
Rolled Hazelnut Wafer Cookies: 12-15 cookies. These add “vertical height” to the board and provide a crisp, nutty element to balance the sugar.
Candy Cane Peppermint Sticks: 8-10 sticks. These provide the iconic “red-and-white striped” visual and a refreshing minty finish to the palate.
Homemade Chocolate Drizzle: 1/4 cup (60ml) chocolate syrup or ganache. This must be glossy and viscous enough to cling to the toasted marshmallows without immediately dissolving.
Foundational Salt: 1/4 tsp (1.5g) fine sea salt. Salt is the culinary bridge that intensifies the chocolate flavor and cuts through the sweetness of the wafers.
Professional Equipment for Plating and Toasting
To recreate the handheld smartphone photo style, you need the right structural foundation. A 15-inch (38cm) dark rustic wooden platter is the ideal stage for your ingredients. The dark wood absorbs light, allowing the “soft natural side-lighting” to highlight the textures of the marshmallows.
You will also need a kitchen culinary torch. While you can toast marshmallows in an oven, a torch allows for precision, creating those specific “golden-brown” spots without melting the entire marshmallow into a puddle. Finally, ensure you have two heavy-bottomed ceramic mugs; ceramic retains heat longer than glass, keeping your rich dark hot chocolate at the optimal drinking temperature while you assemble the rest of the board.
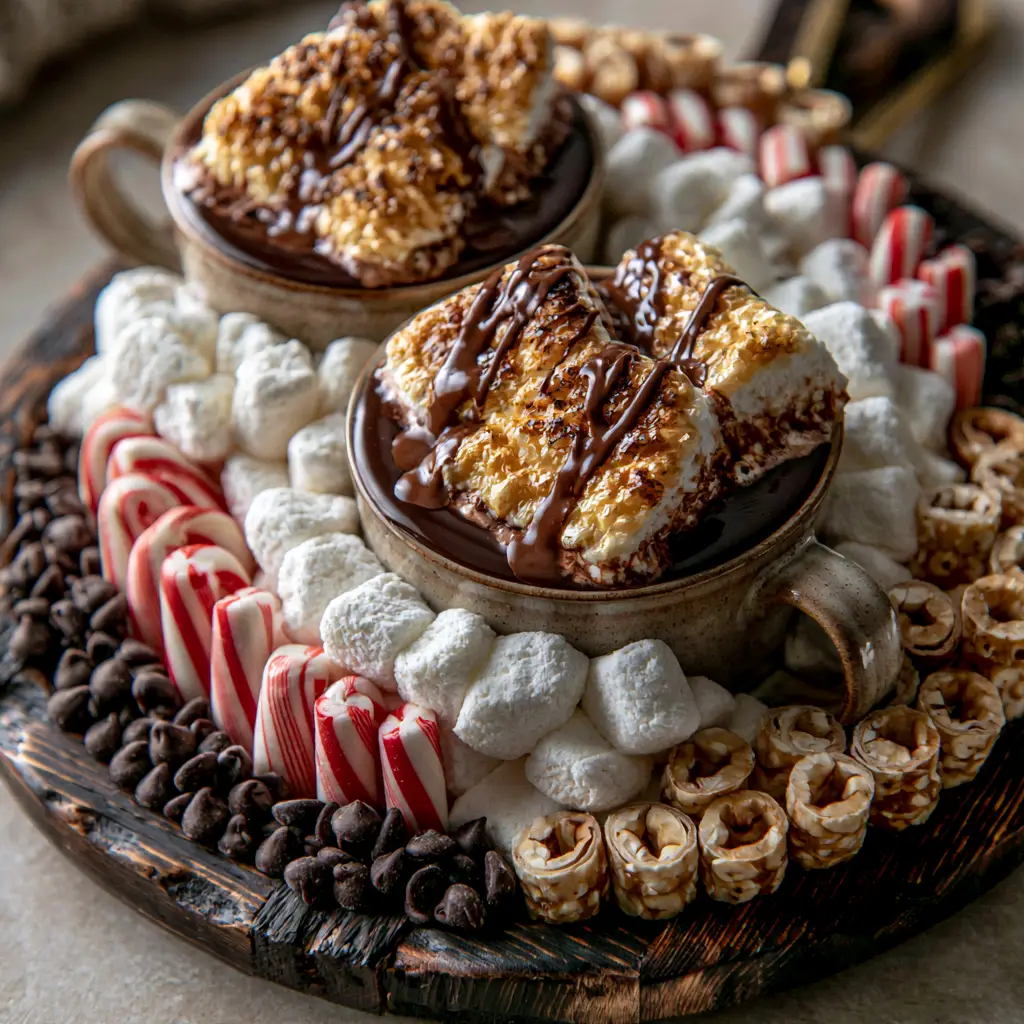
How to Construct the Ultimate Hot Cocoa Charcuterie Board
Crafting the Rich Dark Hot Chocolate Base
In a medium saucepan, whisk together the Dutch-processed cocoa powder, sea salt, and a splash of the milk to create a smooth paste. This prevents clumping. Gradually pour in the remaining milk and heavy cream, whisking constantly over medium heat.
Bring the mixture to a gentle simmer—look for small bubbles forming around the edges, but do not let it reach a rolling boil. Stir in 1/2 cup (90g) of the semi-sweet chocolate chips until completely melted and the liquid is “glossy” and thick. Remove from heat and stir in vanilla extract for aroma.
Mastering the Toasted Marshmallow Topper
Fill your two ceramic mugs 3/4 full with the hot chocolate. Place 3-4 large marshmallows on top of each. Using your culinary torch, move the flame in a circular motion about 2 inches (5cm) away from the marshmallows.
Watch for the “visual cue”: the edges will first turn pale tan, then deepen into a rich golden-brown. Once toasted, immediately apply the glossy chocolate drizzle in a zig-zag pattern. The heat from the toasted marshmallow will help the drizzle “grip” the surface.
Assembling the Abundant Platter Layers
Place the two prepared mugs slightly off-center on your dark rustic wooden platter. Surround the mugs with “neatly arranged layers” of the remaining white marshmallows. Use these as a soft “bed” to prop up your peppermint sticks at an angle.
Nestle the rolled hazelnut wafers in small clusters, creating a fan shape to add movement to the board. Scatter the remaining semi-sweet chocolate chips in the gaps between the larger items. This “filling the voids” technique is what creates the “abundant” look described in the visual prompt.
Expert Tips for a Visual and Culinary Success
- Control the Moisture: If your peppermint sticks start to feel sticky, dust them lightly with powdered sugar before placing them on the board to maintain that crisp visual.
- The Temperature Trick: Pour the hot chocolate into the mugs at the very last second. A Hot cocoa charcuterie board is best served when the cocoa is steaming, creating a “cozy” atmosphere.
- Symmetry vs. Abundance: Don’t strive for perfect symmetry. Overlap the hazelnut wafers and let a few chocolate chips “stray” to give it that organic, handheld photo feel.
- Use High-Quality Wafers: Since the hazelnut wafers provide the “crisp” element, ensure they are fresh. If they’ve been open, a 2-minute toast in a 300°F (150°C) oven will restore their snap.
What to Serve Alongside Your Hot Cocoa Spread
While this board is a meal in itself for dessert lovers, you can balance the sweetness with savory pairings. A crisp hot honey chicken salad offers a spicy contrast that cleanses the palate between sips of rich chocolate. If you are hosting a larger gathering, consider adding more baked goods like a homemade chocolate chip cookies recipe or even some decadent NYC cookies to provide a chewier texture alongside the wafers.
For those who want to lean into the breakfast-for-dinner vibe, serving this board next to a freshly baked cinnamon roll recipe is a guaranteed crowd-pleaser. If you really want to double down on the chocolate, these brownie cookies fit perfectly into the “dark chocolate” aesthetic of the platter.
Storage and Make-Ahead Instructions
The beauty of the Hot cocoa charcuterie board is that 90% of it can be prepped in advance. You can arrange the wafers, peppermint sticks, and dry marshmallows on the platter up to 4 hours ahead; simply cover tightly with plastic wrap to prevent the marshmallows from going stale.
The hot chocolate can be made 2 days in advance and stored in the refrigerator. Reheat gently on the stovetop over low heat, whisking constantly to re-emulsify the fats. Do not freeze the assembled board, as the peppermint sticks will melt and the wafers will lose their crispness in the humidity of a freezer.
Frequently Asked Questions
Yes, substitute the milk and cream with full-fat oat milk or coconut milk, and ensure your chocolate chips and hazelnut wafers are certified vegan.
You can, but for the ‘rich dark’ visual and texture described, a homemade blend of Dutch-processed cocoa and heavy cream is highly recommended.
Use thick-walled ceramic mugs which retain heat better than glass or tin. You can also place the mugs on the board at the very last minute after all other snacks are arranged.
Keep the board in a cool, dry place and avoid placing the peppermint sticks directly against moist items like freshly sliced fruit or steaming mugs until serving.
You can place the marshmallows on a parchment-lined sheet under a broiler for 30-60 seconds, but watch them constantly as they can burn in an instant.
The H1 Title From The Article
Hot Cocoa Charcuterie Board: The Ultimate Festive Dessert Platter
Ingredients
Equipment
Method
- In a saucepan, whisk cocoa powder, salt, and a splash of milk into a smooth paste over medium heat.
- Add remaining milk and cream. Heat until simmering (small bubbles at the edge). Stir in half the chocolate chips until glossy.
- Pour hot cocoa into two ceramic mugs and top with large marshmallows.
- Use a culinary torch to brown marshmallows until golden-brown and fragrant. Apply chocolate drizzle immediately.
- Place mugs on the dark rustic platter. Layer wafers, peppermint sticks, and extra marshmallows in abundant, neat rows around the mugs.
Notes
Torch the marshmallows right before serving for the best aroma.
Final Thoughts on the Ultimate Cocoa Platter
The Hot cocoa charcuterie board is more than just a recipe; it is an invitation to slow down and enjoy the holiday season. By focusing on the “rich dark” tones of the cocoa and the “golden-brown” highlights of the marshmallows, you create a dessert that is as much a feast for the eyes as it is for the soul. We would love to see your creations! Share your photos and tag us, or head over to Pinterest for more festive inspiration. Don’t forget to sign up for our newsletter for weekly culinary blueprints delivered straight to your inbox.