Red Velvet Banana Pudding is the show-stopping, vibrant evolution of a classic Southern staple that combines the cocoa-infused richness of velvet cake with the nostalgic comfort of creamy pudding. If you have ever felt torn between a decadent cake and a refreshing chilled dessert, this recipe bridges that gap with stunning visual layers and sophisticated flavors. Imagine dipping your spoon through clouds of whipped cream into a thick, tangy cream cheese pudding, only to find tender bananas and striking crimson cake crumbs waiting at the bottom.
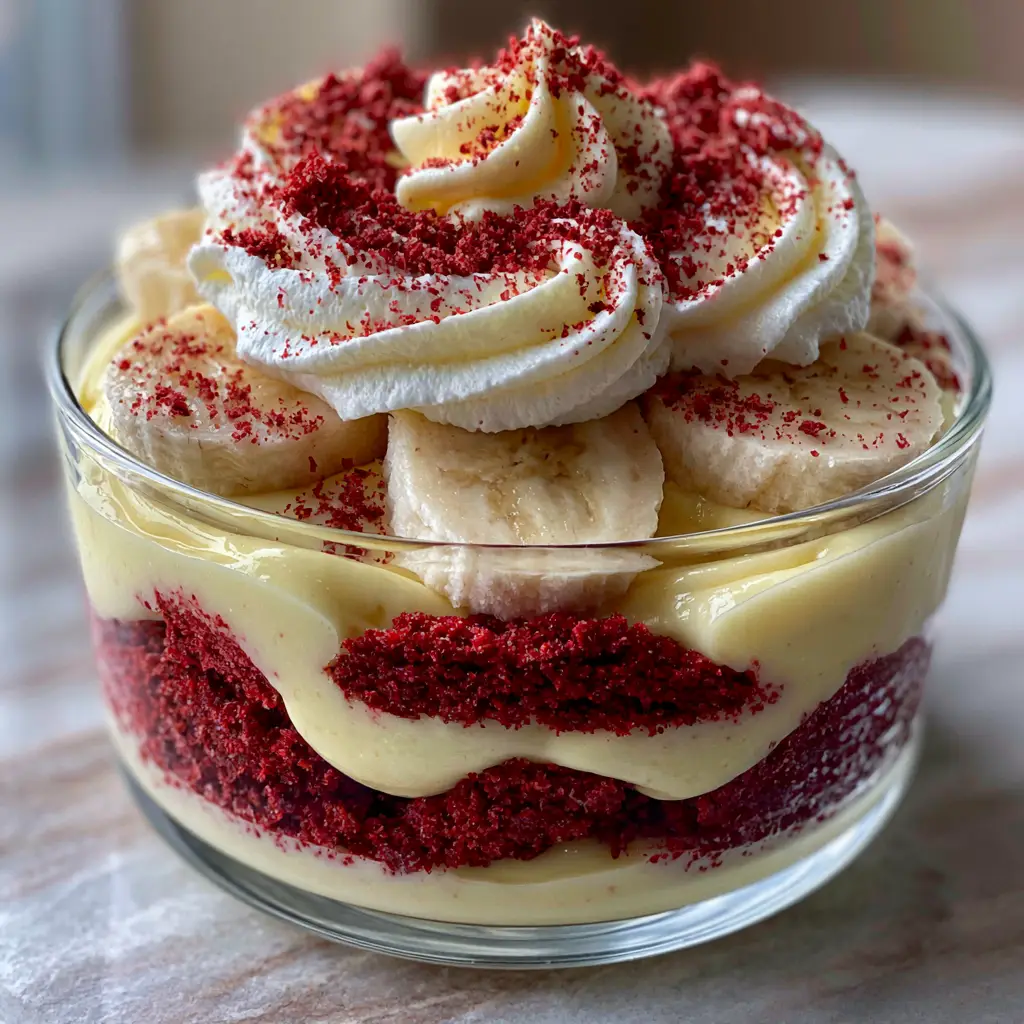
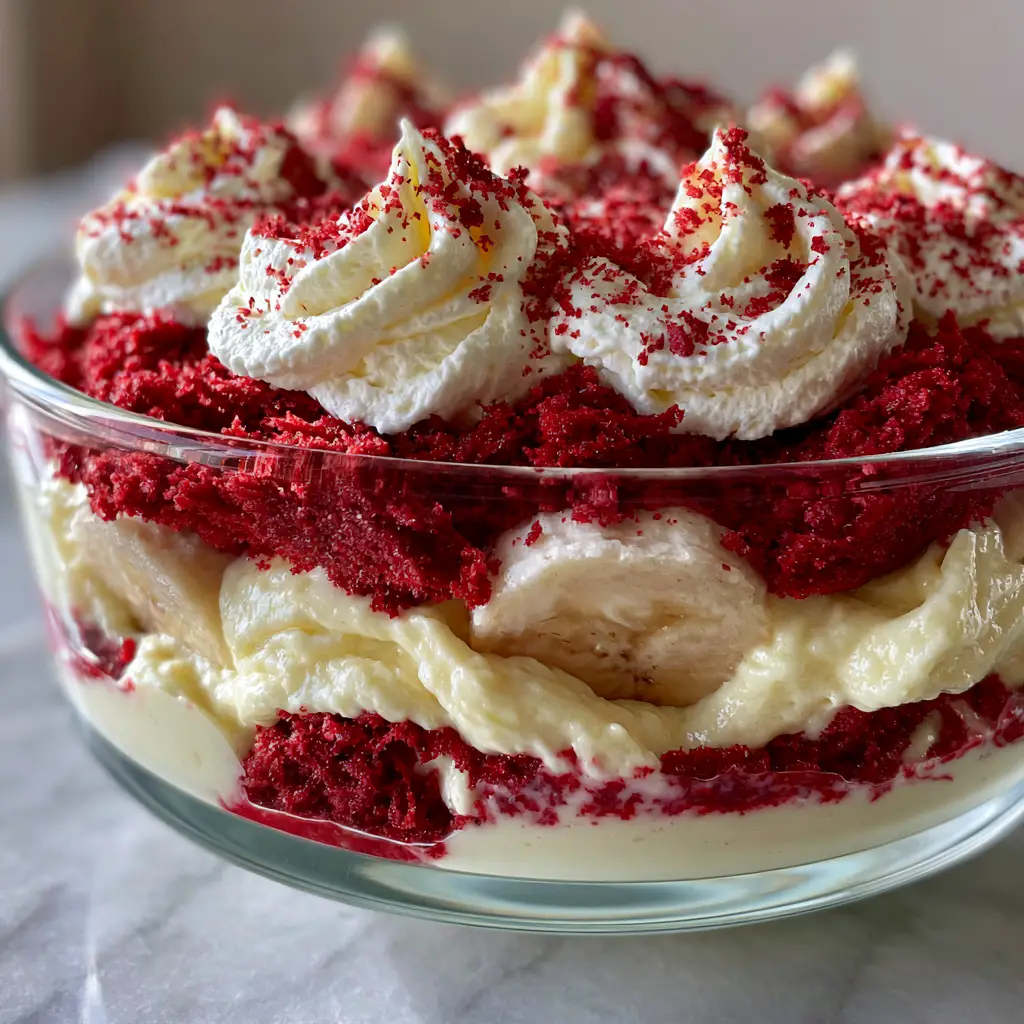
This isn’t your average quick-fix dessert; it is a culinary experience designed for those who appreciate the science of texture. By utilizing a clear glass dish, we showcase the vibrant red velvet cake crumbs against the ivory vanilla cream cheese pudding and the pale yellow of fresh banana slices. The result is a handheld smartphone photo-ready masterpiece that looks as if it stepped right off a professional marble-topped studio set under soft natural daylight.
Whether you are hosting a summer barbecue or looking for a holiday dessert that stands out, this Red Velvet Banana Pudding delivers on every level. It balances the acidity of the cake with the sweetness of the fruit, all held together by a professionally thickened pudding base. Prepare to elevate your dessert game with a recipe that is as structurally sound as it is delicious.
Why You Will Fall in Love With This Layered Masterpiece
- Striking Visual Contrast: The deep, vibrant red velvet cake crumbs provide a stunning physical layer against the thick vanilla cream cheese pudding.
- Sophisticated Flavor Profile: Unlike standard pudding, the addition of cream cheese introduces a tangy depth that cuts through the sugar.
- Perfect Textural Balance: You get the fluffiness of whipped cream, the silkiness of pudding, the soft bite of bananas, and the slight crumb of the cake in every spoonful.
- Make-Ahead Convenience: This dessert actually improves after a few hours in the fridge, making it the perfect stress-free option for entertaining guests.
The Anatomy of Red Velvet Banana Pudding: Ingredients and Substitutions
Red Velvet Cake Flour: 2 ½ cups (312g) of all-purpose flour provides the essential structure for our cake layers. It ensures the crumbs are sturdy enough to hold up against the moisture of the pudding without becoming soggy.
Unsweetened Cocoa Powder: 2 tbsp (15g) is necessary to provide that signature, subtle chocolate undertone characteristic of true red velvet. Avoid Dutch-processed cocoa here to ensure the chemical reaction with the vinegar remains effective for color.
Granulated Sugar: 1 ½ cups (300g) sweetens the cake batter and aids in the browning process during baking. It also helps tenderize the crumb by interfering with gluten development.
Buttermilk: 1 cup (240ml) provides the acidity required to activate the baking soda and gives the cake its famous “velvet” texture. If you don’t have buttermilk, you can use a mixture of whole milk and lemon juice.
Cream Cheese: 8 oz (225g) of full-fat brick cream cheese is the secret to our “thick cream cheese vanilla pudding.” It adds body and a cheesecake-like richness that standard instant puddings lack.
Instant Vanilla Pudding Mix: 5.1 oz (144g) acts as our stabilizing base, ensuring the layers stay distinct and don’t bleed into one another. Ensure you use the “instant” variety rather than “cook and serve” for this specific texture.
Cold Whole Milk: 2 cups (480ml) is required to rehydrate the pudding mix. Using whole milk ensures a creamier mouthfeel compared to low-fat alternatives.
Fresh Bananas: 4-5 large ripe bananas provide the natural sweetness and fruity contrast. Look for bananas with small brown spots for the best flavor, but ensure they are still firm enough to slice neatly.
Heavy Whipping Cream: 2 cups (480ml) creates the “fluffy whipped cream” topping seen in our visual blueprint. Whipping it to stiff peaks is essential for maintaining the height of the dessert.
Distilled White Vinegar: 1 tsp (5ml) reacts with the cocoa and food coloring to brighten the red hue of the cake. This is a foundational element for the “vibrant red” required by our Midjourney prompt.
Essential Culinary Tools for Professional Results
To achieve the clear physical layers described in our blueprint, you will need a large clear glass trifle bowl or individual glass ramekins. Transparency is key to the aesthetic success of this Red Velvet Banana Pudding, allowing the “cake crumb dusting” and layers to be visible from the side. You will also need a high-quality hand mixer or stand mixer to aerate the cream cheese and heavy cream effectively.
A sharp mandoline or a steady chef’s knife is recommended for achieving uniform banana slices, ensuring every bite has an equal distribution of fruit. Finally, a rubber spatula is indispensable for folding the whipped cream into the pudding base without deflating the air bubbles you worked so hard to create. Having these tools ready will streamline the process and ensure a professional finish.
Step-by-Step Evolution of Red Velvet Banana Pudding
Crafting the Vibrant Red Velvet Base
Preheat your oven to 350°F (175°C) and grease a 9×13 inch baking pan. In a large bowl, whisk together your flour, sugar, cocoa powder, and baking soda until perfectly combined. In a separate pitcher, mix the buttermilk, oil, egg, vinegar, and red food coloring until the liquid is a deep, consistent crimson.
Gradually pour the wet ingredients into the dry, whisking until no large lumps remain. Pour the batter into the prepared pan and bake for 25-30 minutes, or until a toothpick inserted comes out clean. Allow the cake to cool completely on a wire rack; this is crucial because warm cake will melt the pudding layers later.
Developing the Thick Cream Cheese Vanilla Pudding
In a large mixing bowl, beat the softened cream cheese until it is smooth and free of any lumps. This step is vital for the “thick cream cheese vanilla pudding” texture—if the cream cheese is too cold, the pudding will be grainy. Slowly stream in the cold milk while continuing to beat at a medium speed.
Add the instant vanilla pudding mix and a splash of vanilla extract, beating for 2 minutes until the mixture thickens significantly. The pudding should be dense enough to hold a soft peak. For an extra airy texture, you can fold in one cup of the prepared whipped cream at this stage, creating a “mousse-like” consistency.
Preparing the Fresh Banana Slices
Peel your bananas and slice them into uniform rounds about 1/4 inch (6mm) thick. To prevent the bananas from browning—a common pitfall in banana pudding—you can lightly toss them in a tablespoon of lemon juice. This acidity stalls the enzymatic browning, keeping the slices looking “fresh” as described in the visual prompt.
Mastering the Art of Layering
Take your cooled red velvet cake and crumble it into small, bite-sized pieces using your hands or a fork. Start by placing a generous layer of these vibrant red velvet cake crumbs at the bottom of your clear glass dish. Follow this with a layer of the thick cream cheese pudding, spreading it to the edges so the layer is visible from the outside.
Arrange the fresh banana slices in a single, overlapping layer on top of the pudding. Repeat these layers—crumbs, pudding, bananas—until you reach the top of the dish. Finish with a thick, billowing layer of fluffy whipped cream, using a spoon to create decorative swirls and peaks.
The Final Flourish: Cake Crumb Dusting
To match our visual recipe blueprint exactly, take a handful of the remaining red velvet crumbs and finely crush them between your fingers. Sprinkle this “cake crumb dusting” over the whipped cream peaks. This provides a professional color contrast and hints at the hidden treasures within the pudding.
Expert Tips for the Perfect Pudding Set
- Chill the Bowl: Before whipping your heavy cream, place your metal mixing bowl and beaters in the freezer for 10 minutes. Cold fat globules in the cream bond more easily, resulting in a fluffier, more stable whipped cream.
- Softened Cream Cheese is Non-Negotiable: If you forget to take your cream cheese out of the fridge, you can microwave it for 15 seconds. Cold cream cheese will never fully emulsify with the pudding, leaving white spots in your yellow pudding.
- Watch the Ripeness: Use bananas that are yellow with just a few brown freckles. Overly ripe, black bananas will turn to mush and ruin the “physical layers” of the dessert.
- Layer to the Edge: When assembling in glass, push the pudding and crumbs all the way to the glass wall. This prevents air pockets and makes those “clear physical layers” pop.
Storage, Shelf Life, and Serving Advice
Red Velvet Banana Pudding is best served after it has chilled for at least 4 hours, or ideally overnight. This time allows the cake crumbs to slightly soften from the moisture of the pudding, creating a cohesive, melt-in-your-mouth texture. Always keep the dish covered with plastic wrap, pressing it directly onto the surface of the whipped cream to prevent a skin from forming.
This dessert will stay fresh in the refrigerator for up to 3 days. Beyond that, the bananas will begin to release moisture and soften excessively, which can make the pudding layers watery. We do not recommend freezing this pudding, as the cream cheese and pudding base will separate and lose their creamy integrity upon thawing.
Creative Pairings for a Full Menu
This decadent dessert pairs beautifully with savory, hearty meals that balance its sweetness. Consider serving it after a main course of smothered chicken and rice for a true Southern-inspired feast. The creamy gravy of the chicken sets the stage for the creamy pudding to follow.
If you are looking for something with a bit more spice to contrast the vanilla cream cheese, our chicken shawarma offers a bright, citrusy profile that cleanses the palate before dessert. For a holiday spread, this pudding looks magnificent alongside a platter of brownie cookies, offering guests a variety of chocolatey textures.
Frequently Asked Questions About Red Velvet Banana Pudding
Absolutely! In fact, it’s better if made 4-8 hours in advance so the flavors can meld and the cake crumbs reach the perfect texture.
Yes, if you are short on time, a high-quality store-bought red velvet cake or even cupcakes can be crumbled to create the vibrant red layers.
To prevent oxidation, toss your fresh banana slices in a small amount of lemon juice or pineapple juice before layering. This keeps them looking bright and fresh for up to 48 hours.
When covered tightly, it stays fresh for up to 3 days. After that, the bananas may become too soft and the whipped cream may lose its stability.
Grainy pudding usually happens if the cream cheese was too cold when mixed. Ensure it is completely softened to room temperature before beating it with the milk.
The Complete Red Velvet Banana Pudding Recipe
Red Velvet Banana Pudding: The Ultimate Southern Fusion Dessert
Ingredients
Equipment
Method
- Whisk dry ingredients, combine with wet ingredients including red food coloring, and bake at 350°F (175°C) for 25-30 minutes. Cool completely.
- Beat softened cream cheese until smooth, then whisk in milk and instant pudding mix until thick and creamy.
- In a separate cold bowl, beat heavy whipping cream until stiff peaks form.
- In a clear glass dish, layer cake crumbs, cream cheese pudding, and fresh banana slices. Repeat until full.
- Top with whipped cream and a final dusting of red velvet cake crumbs for visual contrast.
Notes
Ensure the cake is completely cool before layering to prevent the pudding from melting.
Closing Thoughts on This Modern Classic
The Red Velvet Banana Pudding is more than just a dessert; it’s a conversation starter. With its vibrant hues and professional layering, it proves that home-cooked sweets can rival any bakery display. The combination of tangy cream cheese, soft bananas, and cocoa-kissed cake creates a flavor profile that is truly unforgettable. We invite you to try this recipe and see the magic of the layers for yourself!
If you enjoyed this recipe, please leave a comment below and let us know how your layers turned out! Don’t forget to share your photos and pin this recipe to your favorite boards on Pinterest so you can find it whenever the craving for a decadent treat hits. Happy baking!